what is core?
An often overlooked but essential part of riding a bike is core stability training. Whether you’re a recreational or racing cyclist you can reduce injury risk, enhance riding comfort and improve performance by doing some basic core stability exercises. Despite these benefits, why do so many cyclists find it hard to fit in?
As an endurance sport cycling is time-consuming, requiring time in the saddle to build and maintain a good base. For amateur cyclists finding the balance between work and family commitments can feel challenging and limit available time for cycling. It’s therefore understandable that time on the bike is precious and often prioritised over off-bike training sessions.
As a cycling coach and personal trainer, I help athletes to balance their training load and get the best out of their available time. I take a holistic approach, looking at all aspects of training and injury prevention to support healthy and resilient cyclists. Read on to learn more about the function of core stability in cycling and how to incorporate some simple sessions into your routine.
Core stability is a term used to describe the prevention of unwanted movement of the body’s centre. Stabilisation comes from the body creating the right balance of stiffness where it is needed, with core muscles balancing the load through the spine, pelvis and kinetic chain. Think of your core like a secure central pillar connecting your upper and lower body, providing a solid base from which your arms and legs can move.
why do i need good core stability?
Riding a bike requires the cyclist to generate force to turn the pedals and propel the bike forwards. The torso (or trunk) acts as a platform to contain forces and transfer effort to the limbs. Put simply, the stronger and more stable your core, the less energy is wasted through rocking or swaying. A stable trunk and pelvis will form a secure foundation to maintain good posture on the bike, improve efficiency for sustained power, climb out of the saddle, maintain control over rough terrain and withstand fatigue during long rides.
The muscles making up your core include a combination of deep and superficial muscles throughout the entire midsection of your body which all have their own unique functions to move and stabilise the spine and pelvis. On your front you’ll find transverse and rectus abdominis (or the well-known ‘abs’). Your sides host the internal and external obliques, whilst your back contains quadratus lumborum, multifidus and erector spinae. Minor core muscles include the gluteus maximus (buttocks) and latissimus dorsi (lats) and trapezius (traps) in the shoulder/back.
Let’s not forget the pelvic floor muscles which are located between the public bone and the tail bone (or coccyx) within the pelvis. These provide pelvic girdle stability, bowl and bladder control and support abdominal organs. Particularly important for women, the pelvic floor can become weakened due to childbirth and the menopause.
Imbalanced and weak muscles place increased stress on tissues and joints which inevitably leads to injury and cyclists are commonly affected by back, knee, hip and shoulder pain. Whilst there can be many reasons for injury, core training can help to build greater injury resilience. Of course, bike fit and cycling technique are also important for injury-free cycling.
The following exercises focus on stability and endurance and reflect the nature of riding a bike. Give these 5 equipment-free exercises a try on rest days for better everyday function and improved cycling performance. Start simply by building the habit, 2-3 times per week for 10-20 minutes – you can do them anywhere! This will establish a foundation to progress to more advanced exercises and strength training. If you have a pre-existing injury or health condition, seek professional advice from your physiotherapist or GP before beginning anything new.
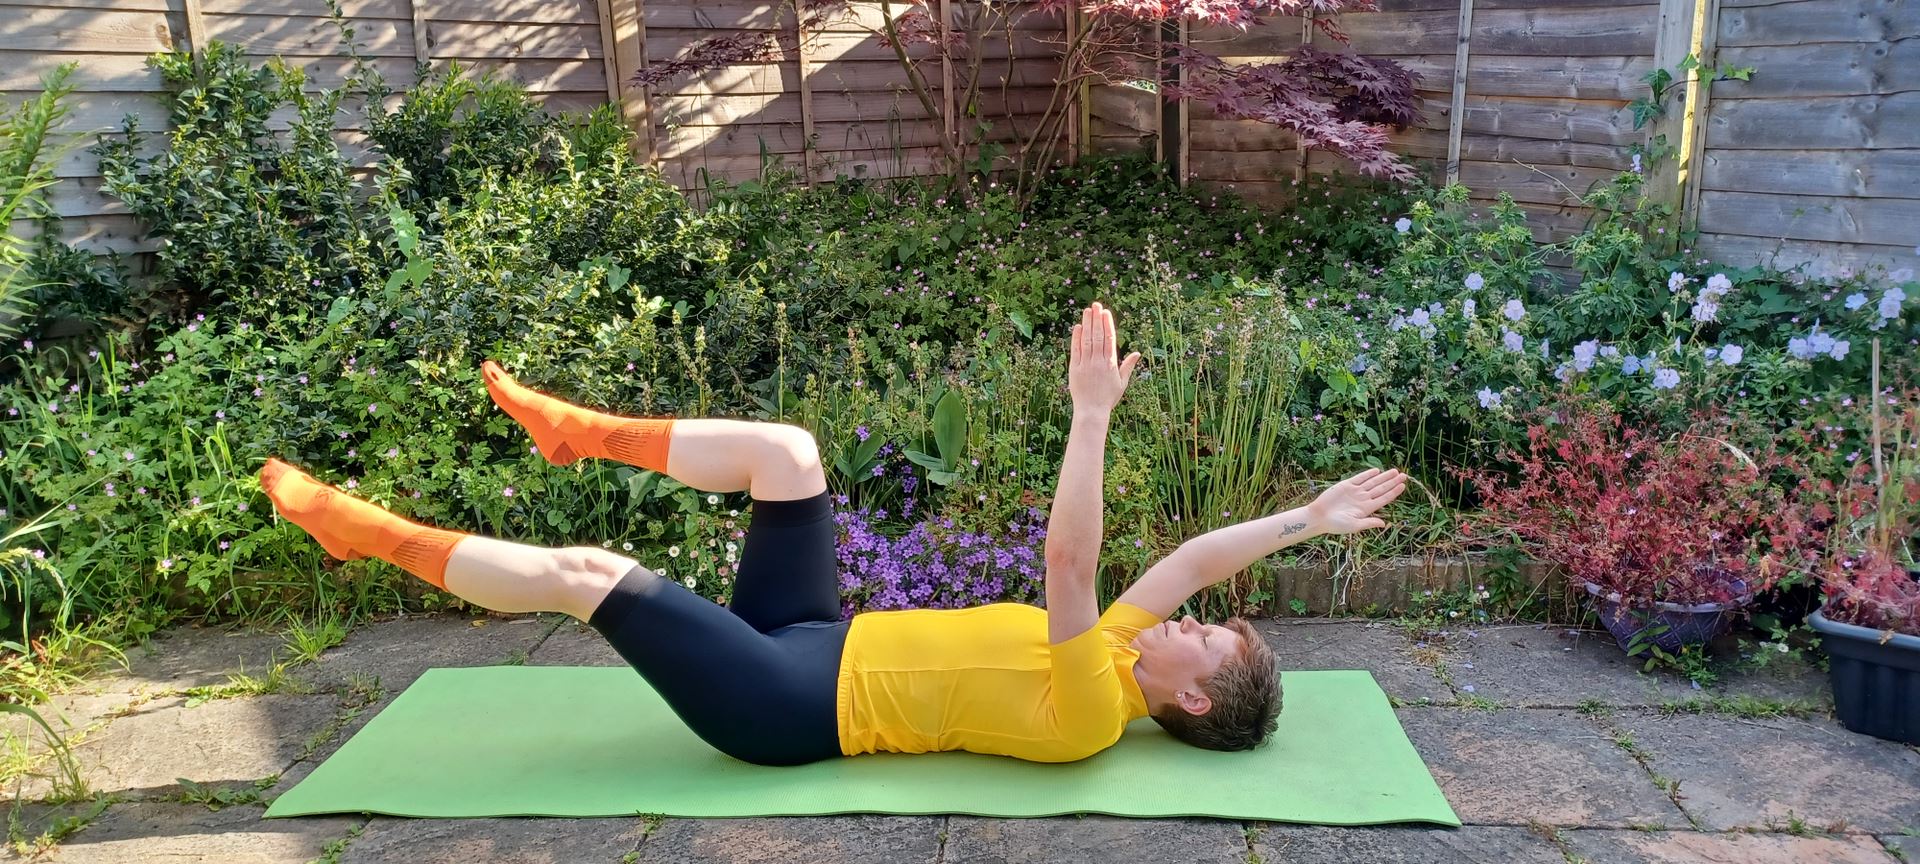
Dead Bug – Replicates functional trunk stability in cycling
Just as you need your trunk to keep steady whilst pedalling, this exercise works a range of core muscles to keep your body stable while extending arms and legs. The transverse abdominis, erector spinae, obliques, rectus abdominis, and the pelvic floor are all being challenged here.
-Use a yoga mat or folded towel to lie on.
-Starting position: Lie on the mat or towel with arms extended above the chest so they are at 90 degrees with the torso. Lift feet from the ground and bend hips and knees to 90 degrees forming a right angle.
-Engage your core, pulling belly button towards the mat. Feel and maintain constant contact between the lower back and the mat. The spine should stay in this neutral position for the duration of the exercise.
-Hold the right arm and left leg in position and slowly reach the left arm backwards, over the head and toward the floor. At the same time, extend the right knee and hip, reaching the right heel towards the floor. Keep breathing throughout and avoid twisting or movement of the hips. Stop the movement just before the arm and leg touch the ground or the back begins to arch away from the mat.
-Return left arm and right leg to starting positions, reversing the movement.
-Repeat the movements on the opposite sides, this time holding the left arm and right leg in position as the right arm and left leg begin to extend.
-Complete the same number of repetitions on each side, initially aim for 6-8 reps each side.
Top tips:
Keep it slow and focus on quality of movement.
Reduce the range of motion if your back begins to arch.
Make it easier by only moving arms, or only legs.
Make it harder by holding an object (like a foam roller) and passing it between hands and knees.
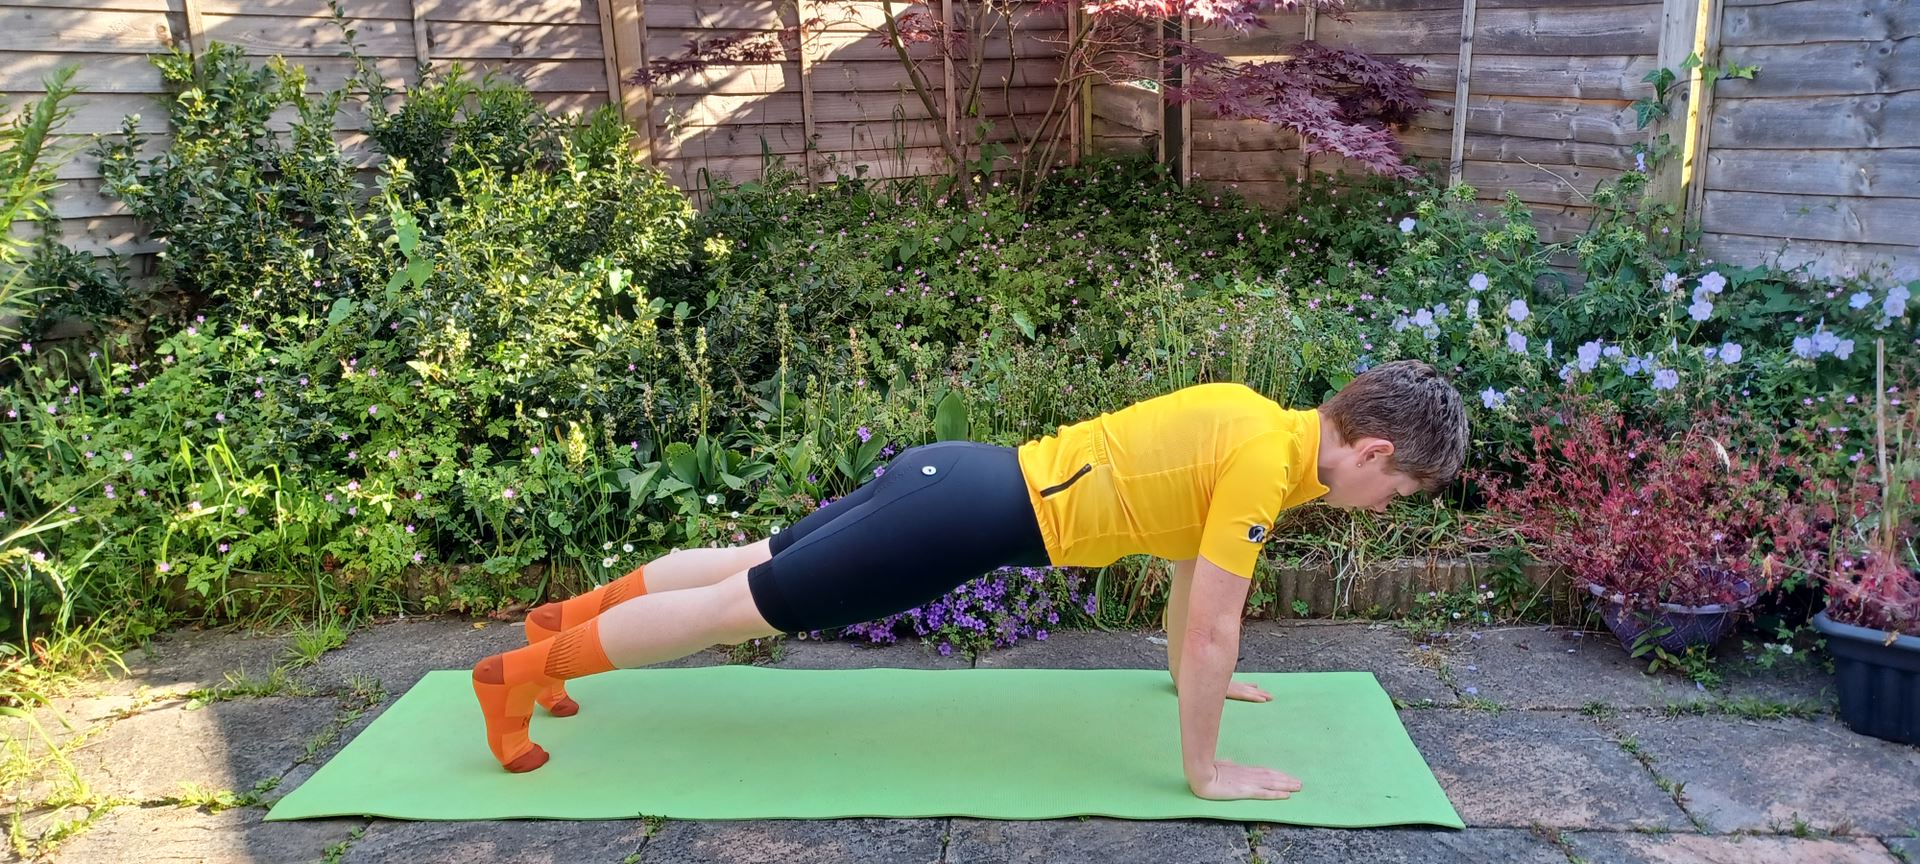
Plank – Improves cycling efficiency in an aerodynamic position
The plank position is a familiar go-to exercise which targets multiple muscle groups and forms the basis of more progressive exercise variations. Choose whether to perform a plank on your hands (high plank) or on your forearms. Beginners will find forearms are a more comfortable position to start.
-Use a yoga mat or folded towel to lie on.
-Starting position: Start in your chosen plank position, face downwards with your forearms facing forward (or hands if ‘high plank’) and toes on the floor. Elbows or hands should be directly under shoulders.
-Pull your belly button towards the spine to engage the core. Tuck the tail bone under and keep body in a straight line from head to toes, with no sagging or bending.
-Initially hold for 30 seconds and work towards 45 seconds, then 1 minute.
Top tips:
Keep shoulders and neck relaxed.
Start with plank position on forearms and progress to high plank.
When you can plank for 1 minute, try alternate shoulder or toe taps, minimising trunk rotation.
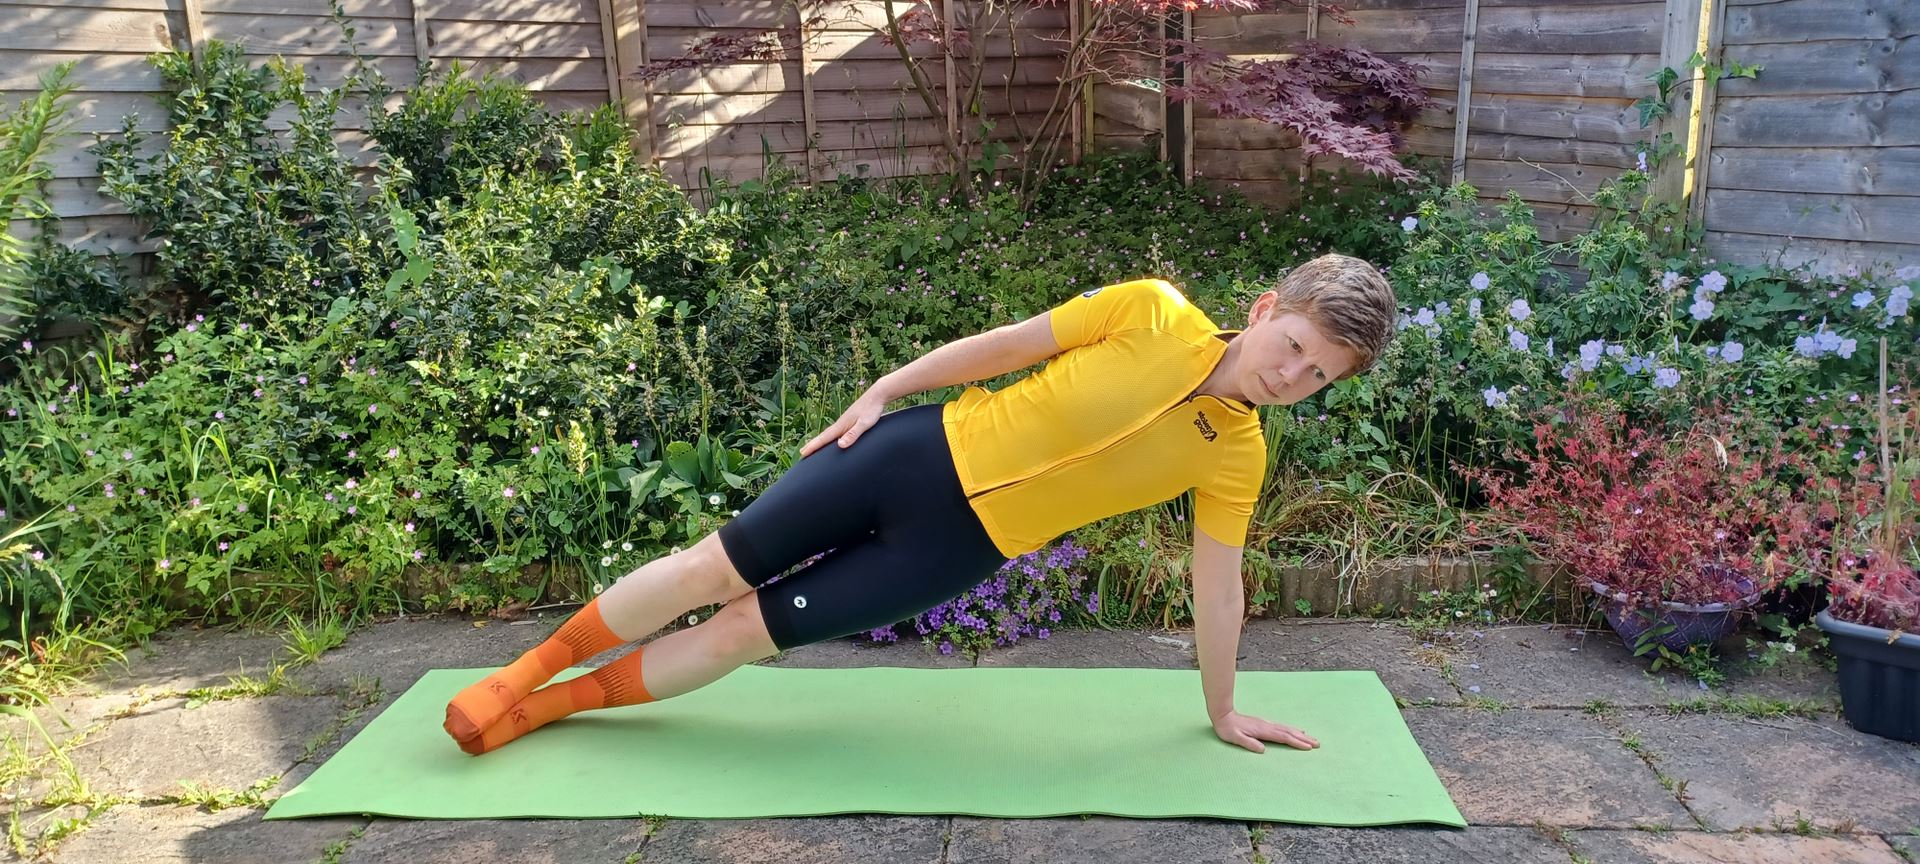
Side plank – Improves stabilisation when climbing out of the saddle
The side plank is great for hip and shoulder stabilisation and works the obliques and glutes. This exercise helps cyclists to resist lateral flexion, controlling forces while rocking from side-to-side, like when climbing a hill.
-Use a yoga mat or folded towel to lie on.
-Starting position: Lie on your right side with legs extended in line from hips to feet. Place the right elbow directly under the shoulder. Keep head in line with spine. Rest left arm along the left side of body.
-Pull belly button towards the spine to engage the core.
-Lift hips and knees from the mat keeping torso straight and in line with no sagging or bending.
-Aim to hold this position for 30 seconds and then return to the starting position. Swap sides and repeat.
Top tips:
Keep slow and controlled breathing throughout.
Make it easier by starting on bent knees.
Make it harder in ‘high plank’ position on hands.
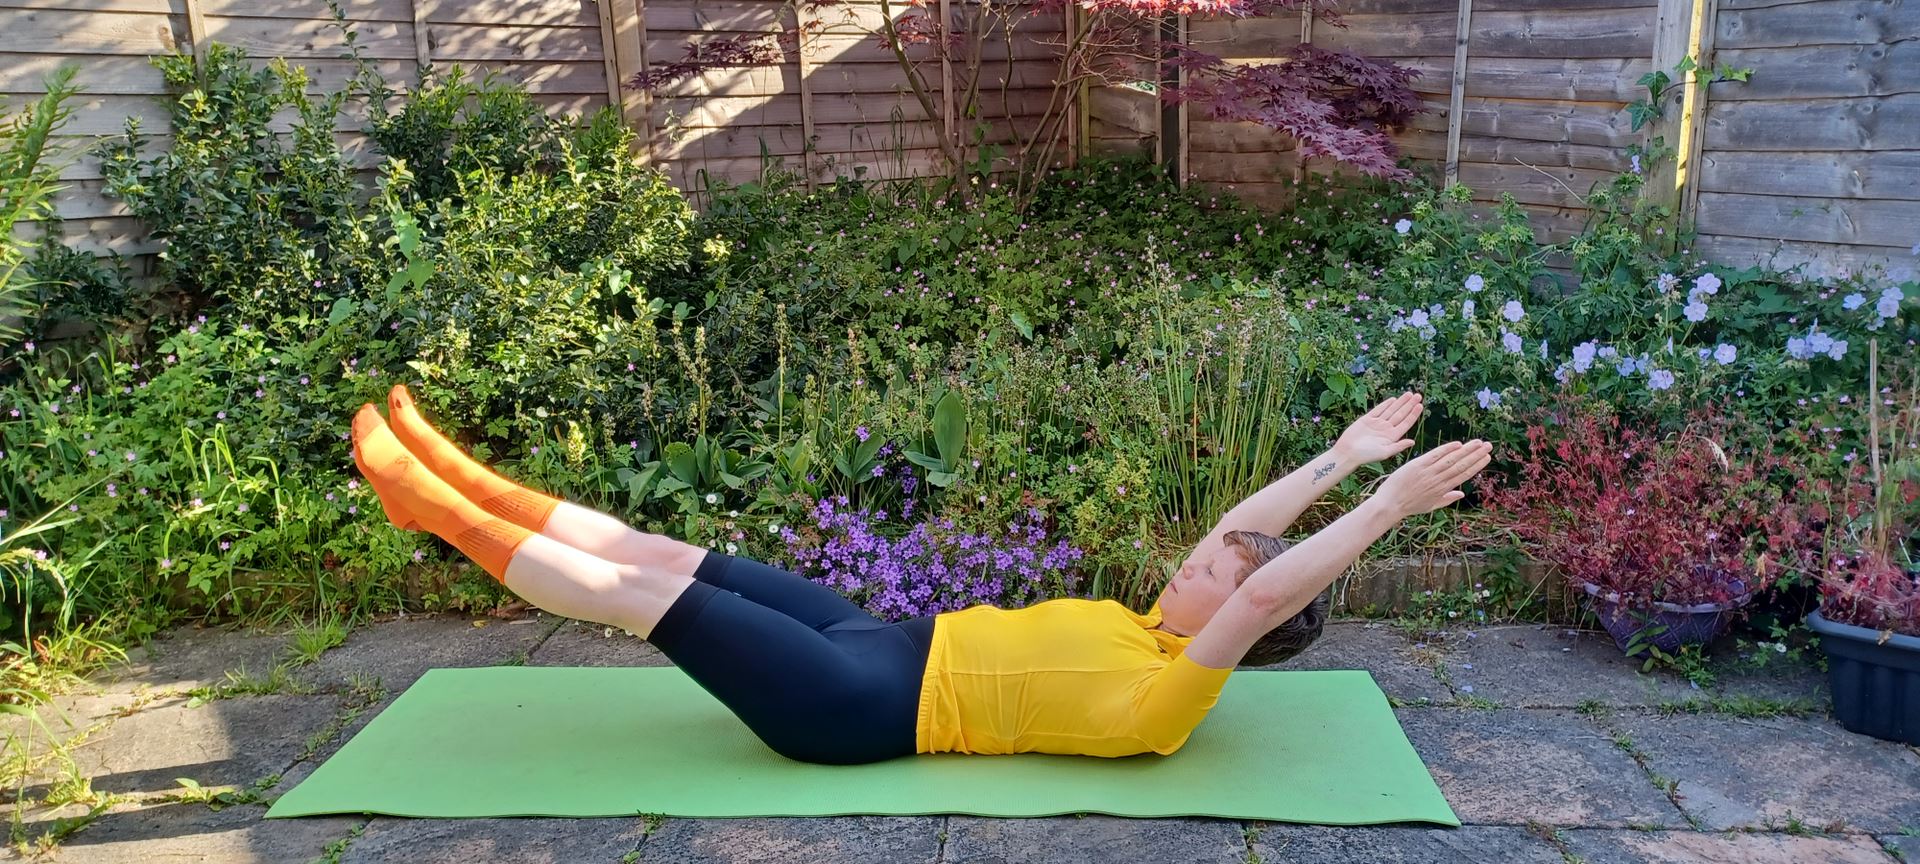
Hollow Hold – Improves trunk control for higher cadence or resistance efforts
An isometric exercise which uses multiple muscles groups, including transverse abdominis, rectus abdominis, obliques, quads, hip flexors, inner thighs, and erector spinae.
-Use a yoga mat or folded towel to lie on.
-Starting position: Lie down on the floor on your back with legs extended and arms by your sides.
-Pull your belly button towards the floor to engage your core and drive your lower back into the ground. Squeeze your thighs together to begin the move.
-Raise your legs up while keeping the lower back on the floor.
-Raise your head off the floor and extend your arms overhead and behind you.
-Hold position for up to 30 seconds.
Top tips:
Start with 10 seconds and work towards holding position for 30 seconds.
Keep breathing! Don’t hold your breath.
Keep neck and shoulders relaxed.
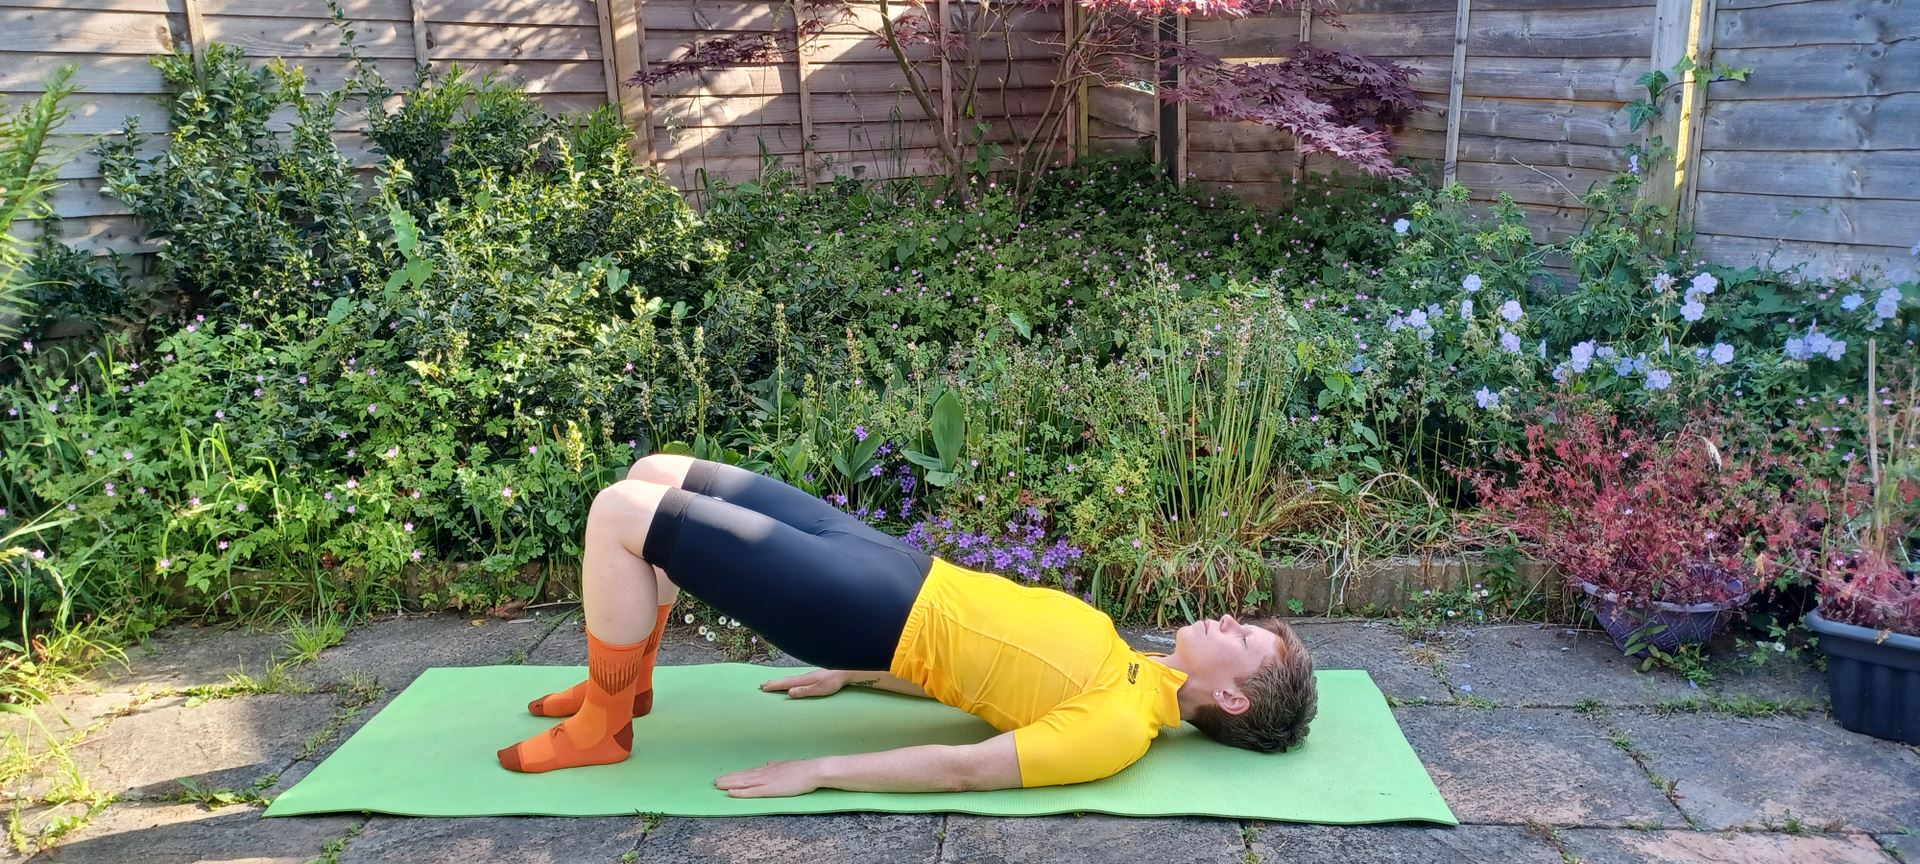
Glute Bridge – improves core and pelvic stability for strength and power output
The glute bridge works your glutes, hamstrings, and transverse abdominis. Also great for stretching out hips which spend a lot of time in flexion when cycling and sitting down.
-Use a yoga mat or folded towel to lie on.
-Starting position: Lie on your back placing your hands down at your sides. Your knees should be bent with your feet flat on the floor, hip width apart beneath your knees.
-Squeeze and tighten your glutes and pull your belly button towards your spine. Then push your heels into the floor to raise your hips up towards the ceiling, creating a line from your knees to shoulders.
-Pause and hold for a moment at the top of the movement before returning to the starting position by lowering your hips to the mat/towel. That’s one rep.
-Aim to start with 10-12 reps.
Top tips:
Keep movements slow and controlled.
Keep neck and shoulders relaxed.
Avoid raising your hips too high and/or arching your back
Make it harder by progressing to a single leg bridge, by lifting one leg off the ground.
Stretching and mobility also have an important role to play in core stability to ensure that functional flexibility and range of movement are maintained and addressing those muscular imbalances mentioned earlier but that’s for another time!
Thank you to our contributor Heidi Blunden of Parallel Cycle coaching for writing this article.