Taking better cycling photos is a guest post by Chris Feichtner from squics.com.
Chris is from Vienna and has been photographing for over 20 years. In 2012 he ditched the DSLR, switched to iPhone photography and has never looked back!
Chris writes about cool places to photograph, the apps and gear he uses. He explains how to shoot, edit, manage and publish photos with an iPhone, so nice and simple to carry when out for a Sunday ride!
I’ve photographed for more than a decade using a DSLR. I documented concerts and events here in Vienna before I turned to travel photography. During trips in 2012, I started to use the iPhone as a snapshot camera and I was pleasantly surprised by the image quality. So, one day in Las Vegas, I left the DSLR in the hotel and photographed an entire day exclusively using my iPhone.
From then on, I started using my iPhone more and more to photograph during my trips. A few months later, I sold my DSLR and all accessories, and fully turned to iPhone photography, despite the limitations of the iPhone camera at that time.
As camera and editing apps became better and better, those limitations gradually faded. Today I can use techniques like shooting long exposures or capturing night photography with little or no noise (grain), all using an iPhone. Using a very limited number of iPhone photo apps I can even retouch photos right there on the iPhone. I can remove objects and people and work with layers and masks, something that previously required me to use a desktop computer.
So, over the years, iPhone not only replaced my camera, but it also replaced my notebook for editing, managing and sharing my travel photos. I can do it all with a single device in the palm of my hand.
Not cycling photos but here are some of my personal favourite shots, taken and edited with an iPhone:
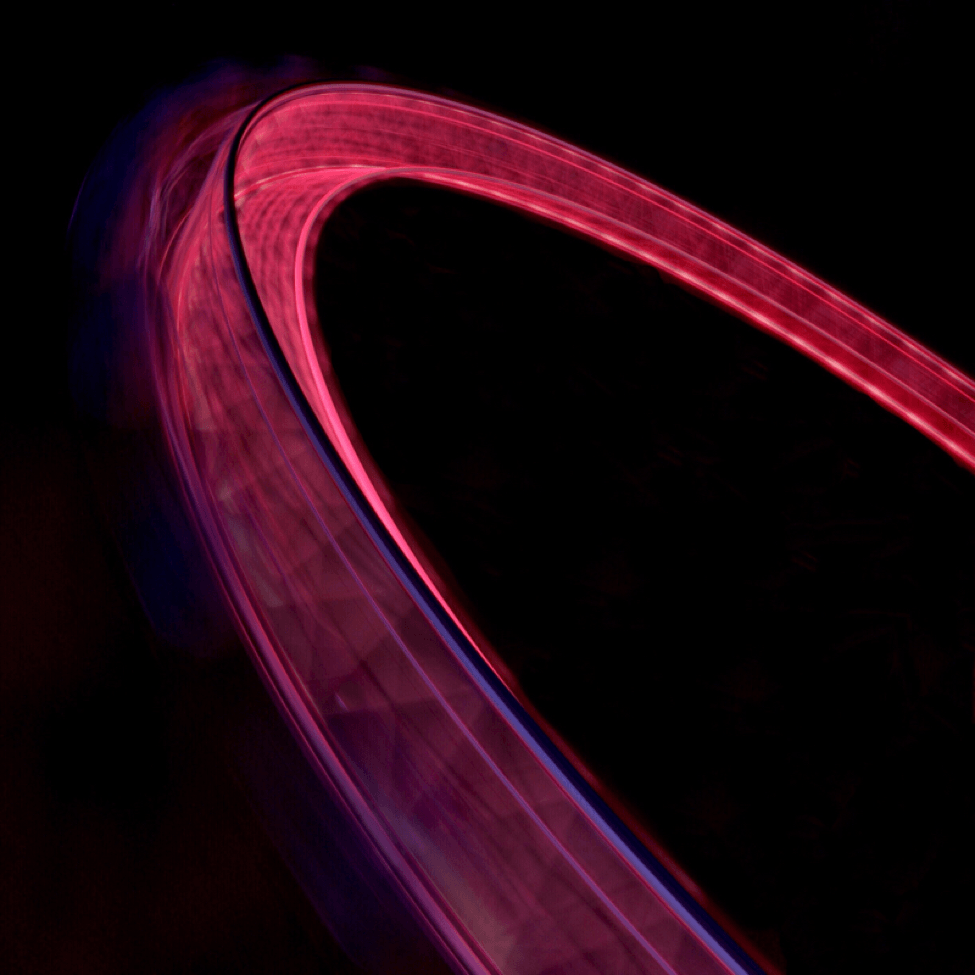
40 second long exposure of the London Eye at night
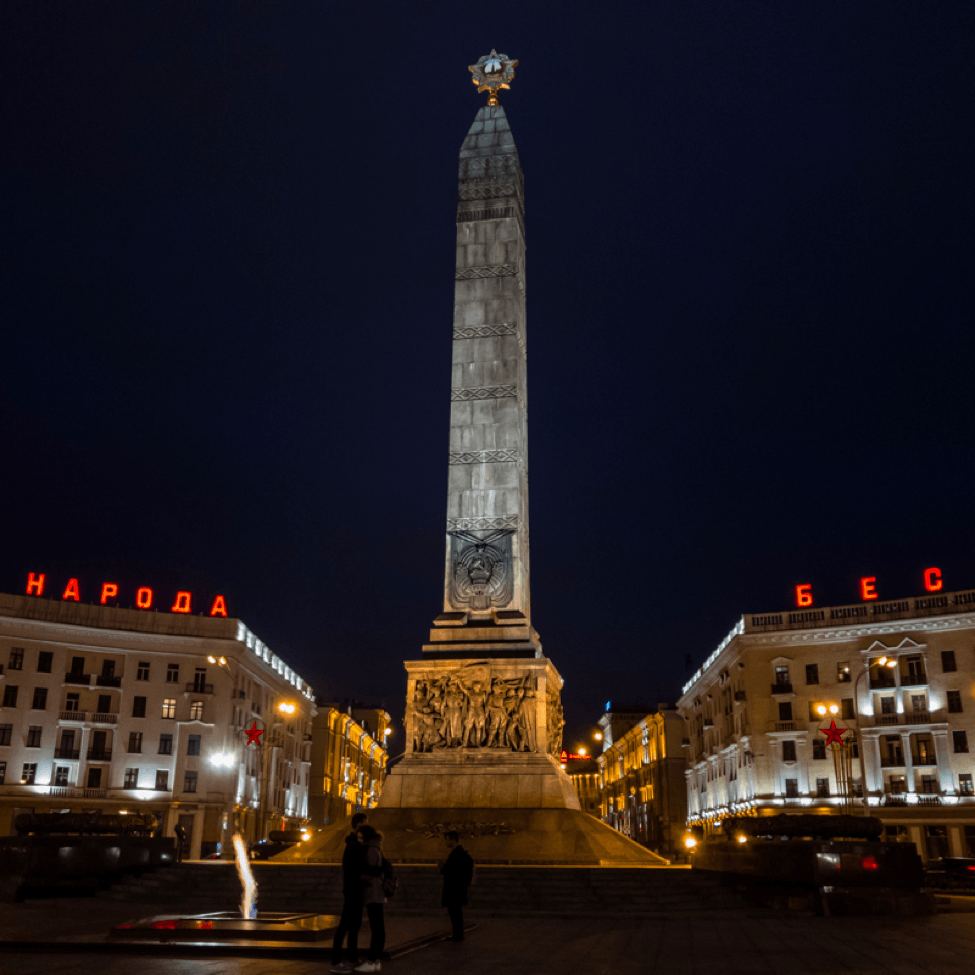
Victory Square in Minsk, Belarus
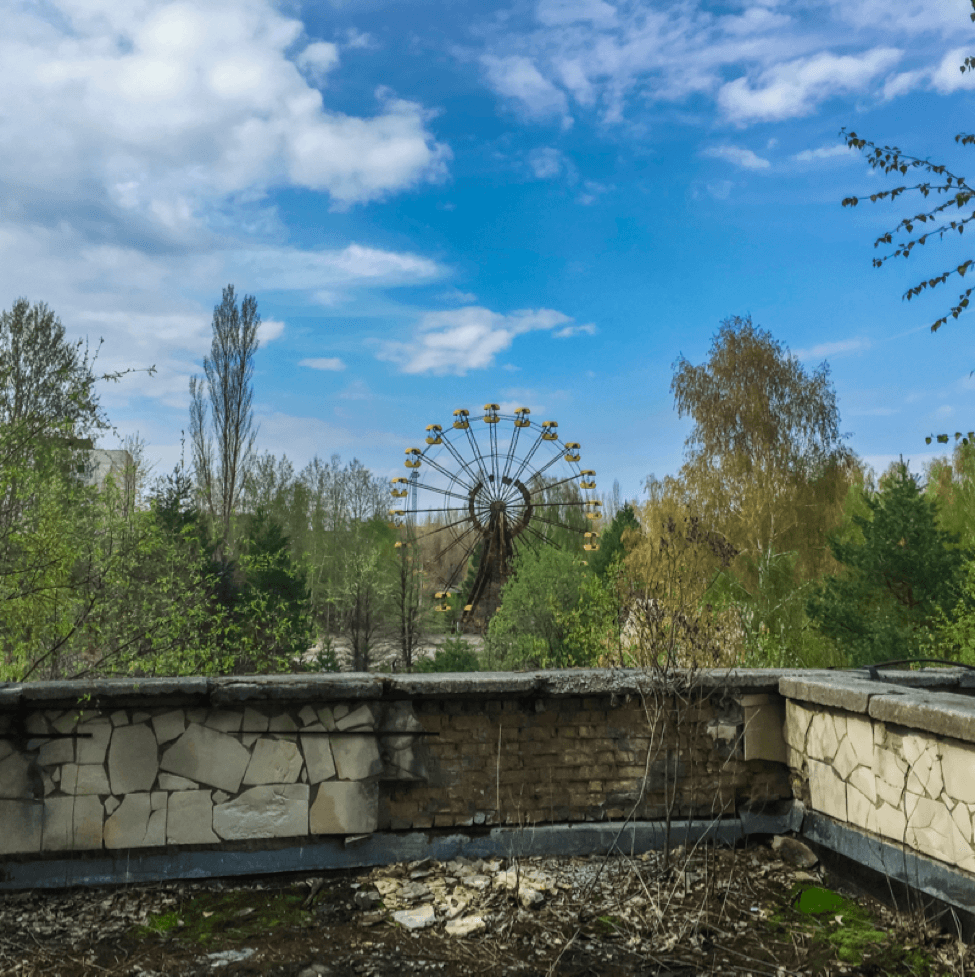
Ferris Wheel in Pripyat, Chernobyl Exclusion Zone.
Here are 5 tips to help you take great cycling photos using an iPhone
1. Get a Case
This is probably the most important tip, especially when you plan to use your iPhone for cycling photos. I learned it the hard way. Protect your precious iPhone! Almost any case from any brand will do. However, I prefer cases made from leather. They’re thin and provide a good protection when your iPhone slips out of your pocket or hand.
For my trips to Iceland and Chernobyl, when I still used an iPhone 6, I used a Moment case. It’s an excellent item that allows you to attach a wrist strap to it for additional safety and lets you mount the Moment iPhone lenses quickly and easily.
2. Get the Gear
One reason – well, actually the main reason – why I ditched the DSLR in favour of an iPhone was because I love to travel light. No more heavy camera bodies, no more heavy lenses, and no more bulky tripods. Although I still do carry lenses and even a tripod for my iPhone.
I’m a fan of and regularly use the Moment lenses, especially the wide-angle lens which is great for landscape photos. Given that they are small while still providing excellent image quality, they’re worth the hefty price tag.
I also always carry a small Joby Griptight Gorillapod, a small tripod that you can wrap around almost anything, such as the handlebar of your bike. The Griptight Mount is basically a small claw that grips (and holds) your iPhone when it’s mounted to the Gorillapod and it works with all other standard tripods, too.
Finally, I used to carry lots of spare batteries back in my DSLR era. Today, I carry a 26800 maH Anker PowerCore+ battery pack. That’s enough power to charge your iPhone up to 10 times and should be enough for a weekend trip into the wilderness.
3. Get the Apps
With the iPhone stock camera app and the editing functions in the camera roll, you are already equipped with a great camera app and a simple way to make adjustments to your photos. But there are some special settings where the stock iPhone camera app will fail.
I’ve tried dozens of different camera and editing apps but only a few of them survived the frequent spring cleaning on my iPhone. So here are the iPhone camera apps I use most often:
- Slow Shutter Camfor shooting long exposures
- Hydrafor shooting 32 megapixel photos in certain situations
- ProCamerafor full manual control and an excellent low light shooting mode
I also like to travel light when it comes to iPhone photo editing apps. So, I mainly use the following four apps:
- Adobe Lightroom Mobileto develop RAW photos shot with iPhone 10
- Enlightfor retouching
- SKRWTto fix perspective distortions when photographing buildings
- Pixelmatorfor retouching
And that’s all. A total of 8 apps which included the stock camera app. That’s all I use to shoot and edit my photos on the go.
Here are some more shots I took using the apps mentioned above:
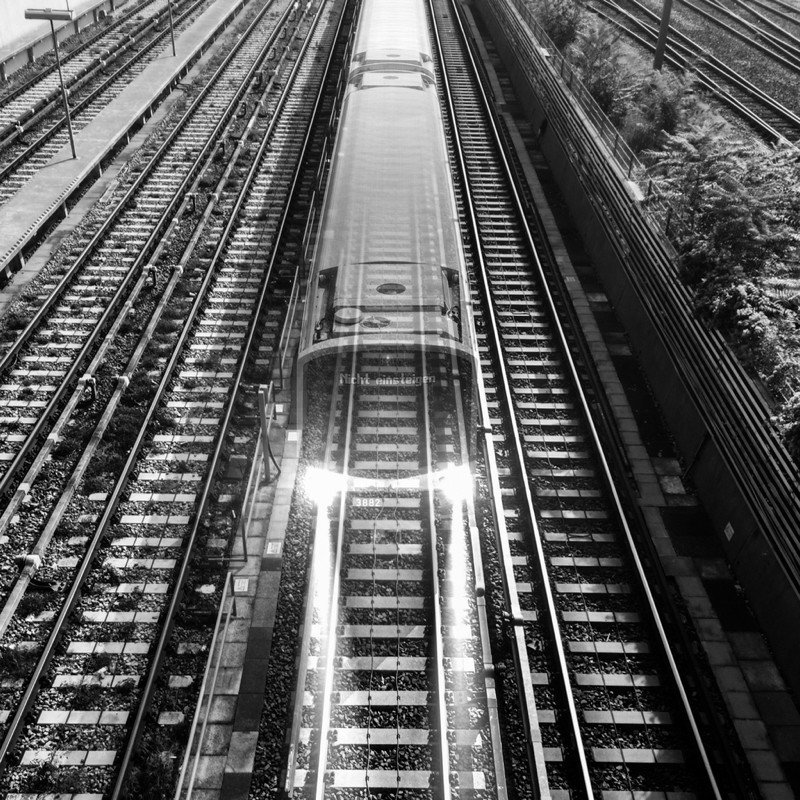
I took this shot using Slow Shutter Cam App. My iPhone was mounted to the handrail of a bridge under which trains were passing.
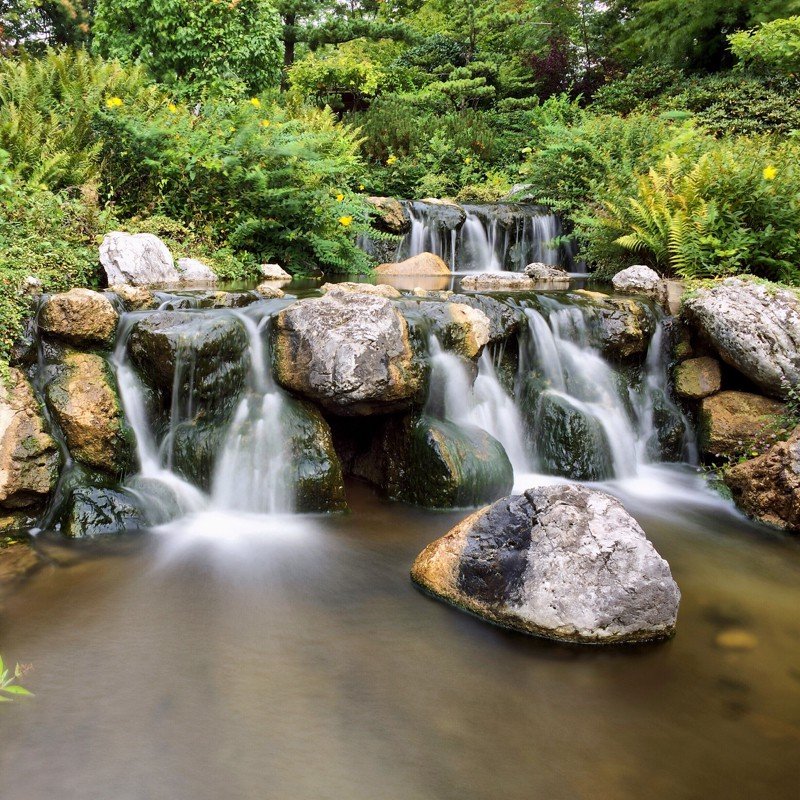
A beautiful Japanese Garden in Vienna. Shot using Slow Shutter Cam app.
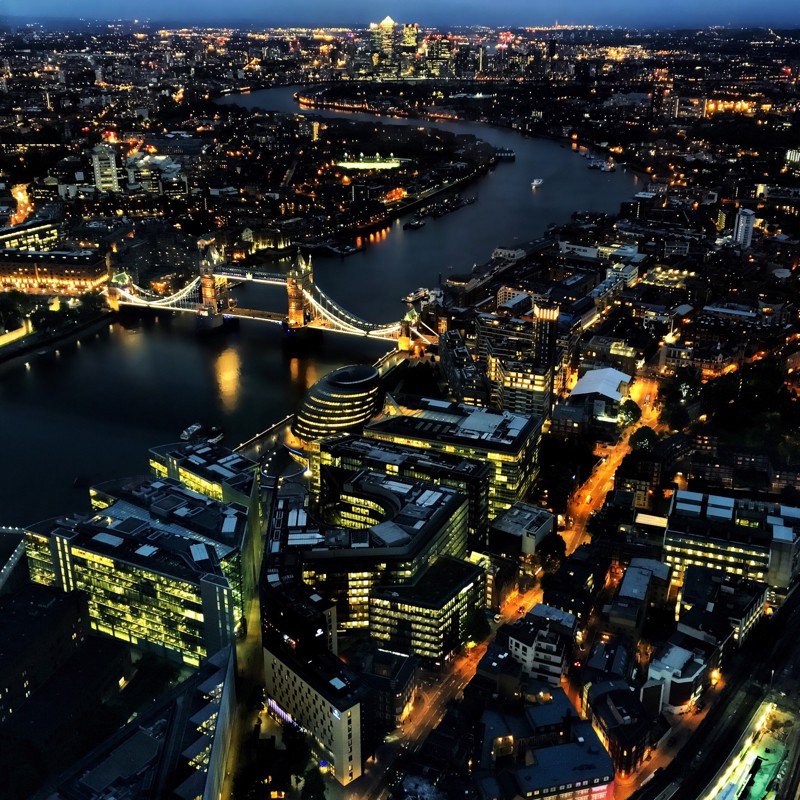
The view from the Shard in London, taken with ProCamera using Low Light Mode.
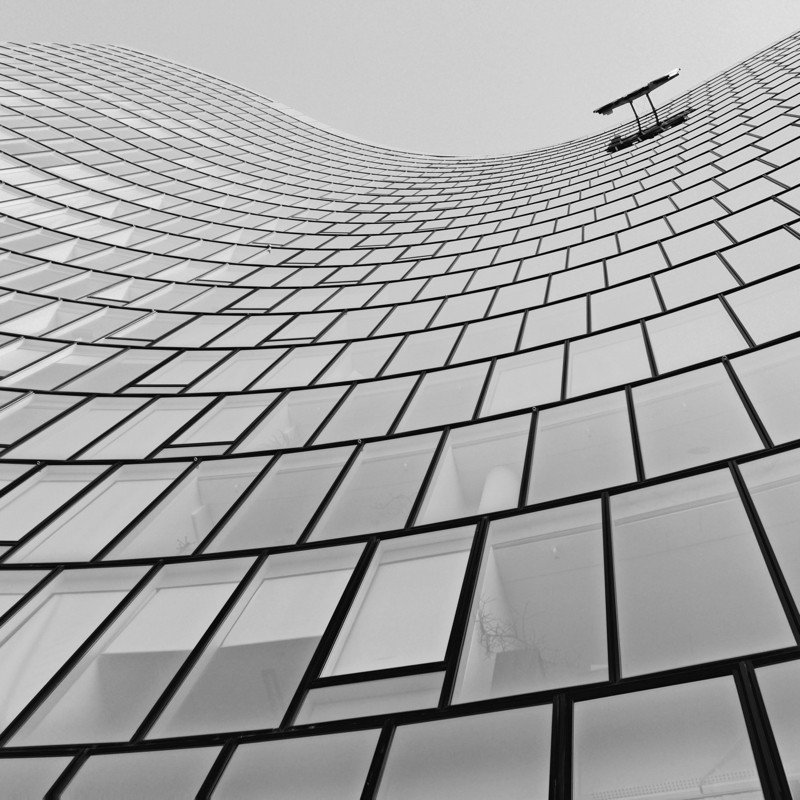
An office Skyscraper in Vienna photographed with Hydra App.
If I had to pick only one app, it would be ProCamera, simply because it offers me full manual control over the iPhone camera and still works as a point and shoot camera app. If you want to invest and learn photo editing and retouching, I strongly suggest you buy Enlight.
4. Get Going
I have defined three very simple principles for my iPhone photography and cycling photos. The first one is “Always tap to focus”. Usually, the iPhone will automatically select and focus on whatever it thinks is the main subject of your photo. But the iPhone may be wrong. I recommend always tapping on the screen and focusing on the object that’s your main subject to make sure it’s perfectly lit and sharp.
My second principle is to always slightly underexpose, especially outdoors. To slightly underexpose your shots, tap and hold the iPhone screen and then drag your finger down. A small bar will appear that allows you to adjust the exposure in the stock camera app. After that, experiment with brilliance and increasing shadows for a better landscape shot.
Finally, I always walk the extra mile or wait the extra minute. Take your time to explore the area, walk around and take as many cycling photos as you like. Then, delete all but the best one. The best way to learn how to shoot is simply to get started – so get on your bike and go!