“Change a man’s bicycle inner tube and he rides for a day. Teach a man to change his inner tube and he rides for a lifetime”: Cycling Jesus*.
* Possibly
‘P’ which must not be named; especially by that one member of your winter group ride who always pipes up with ‘This is great; we haven’t had any punctures yet…’. You know who you are. Don’t be that guy.
To some, simply a minor inconvenience and a few oily fingers. To others, an flat tyre can mean the difference between riding to work or inhaling fellow commuters’ armpits. Or just not riding for weeks on end, enjoying sofa, not saddle-time. We asked Martin at Cycle-Tech UK to give us his advice: you need look no further the next time you need to change that bicycle inner tube.
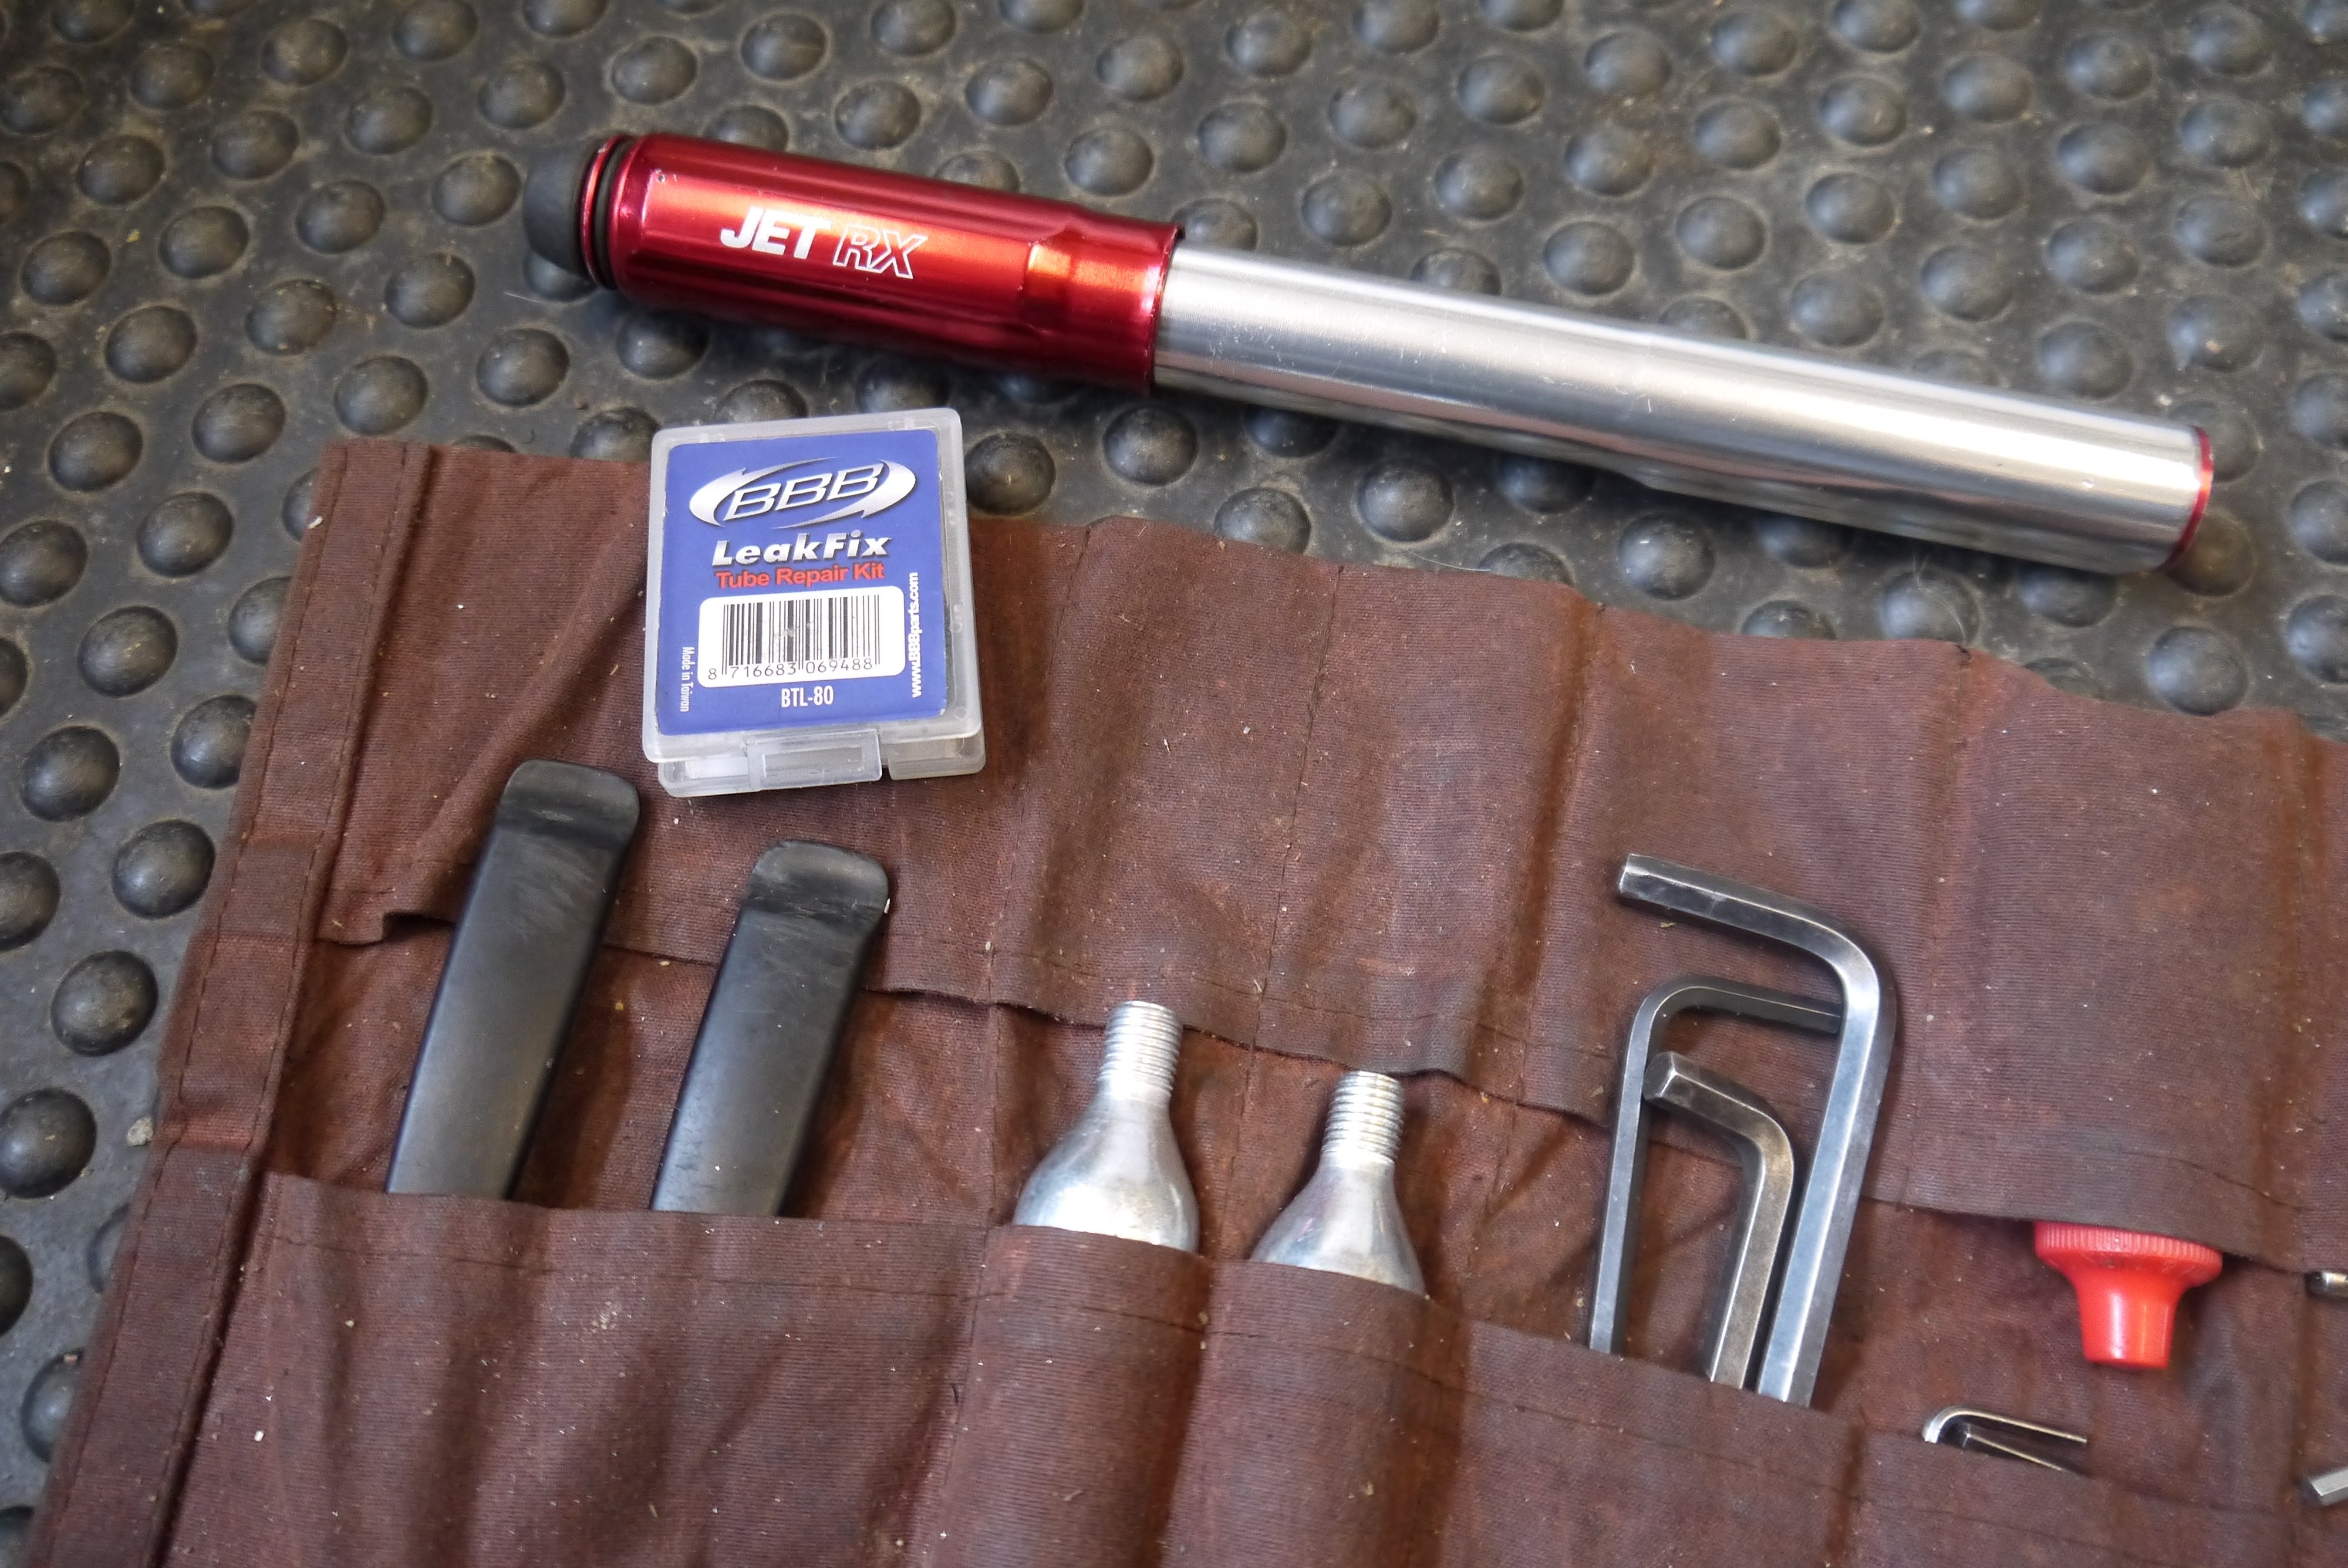
Tools you’ll need:
- Tyre levers x2
- Small screw driver
- Spare bicycle inner tube
- Pump
- Rag / Tissue
- Bicycle puncture repair kit for emergencies
Step 1: Remove the wheel.
Undo the quick-release skewer that holds the wheel to the frame. If you need to remove the rear wheel, make sure the derailleur is on the smallest sprocket. Then flick the break calliper quick-release (for Shimano, they are on the brakes themselves, for Campagnolo, they are on the hoods). The wheel should drop out with a little encouragement.
Step 2: Get the tyre off and tube out.
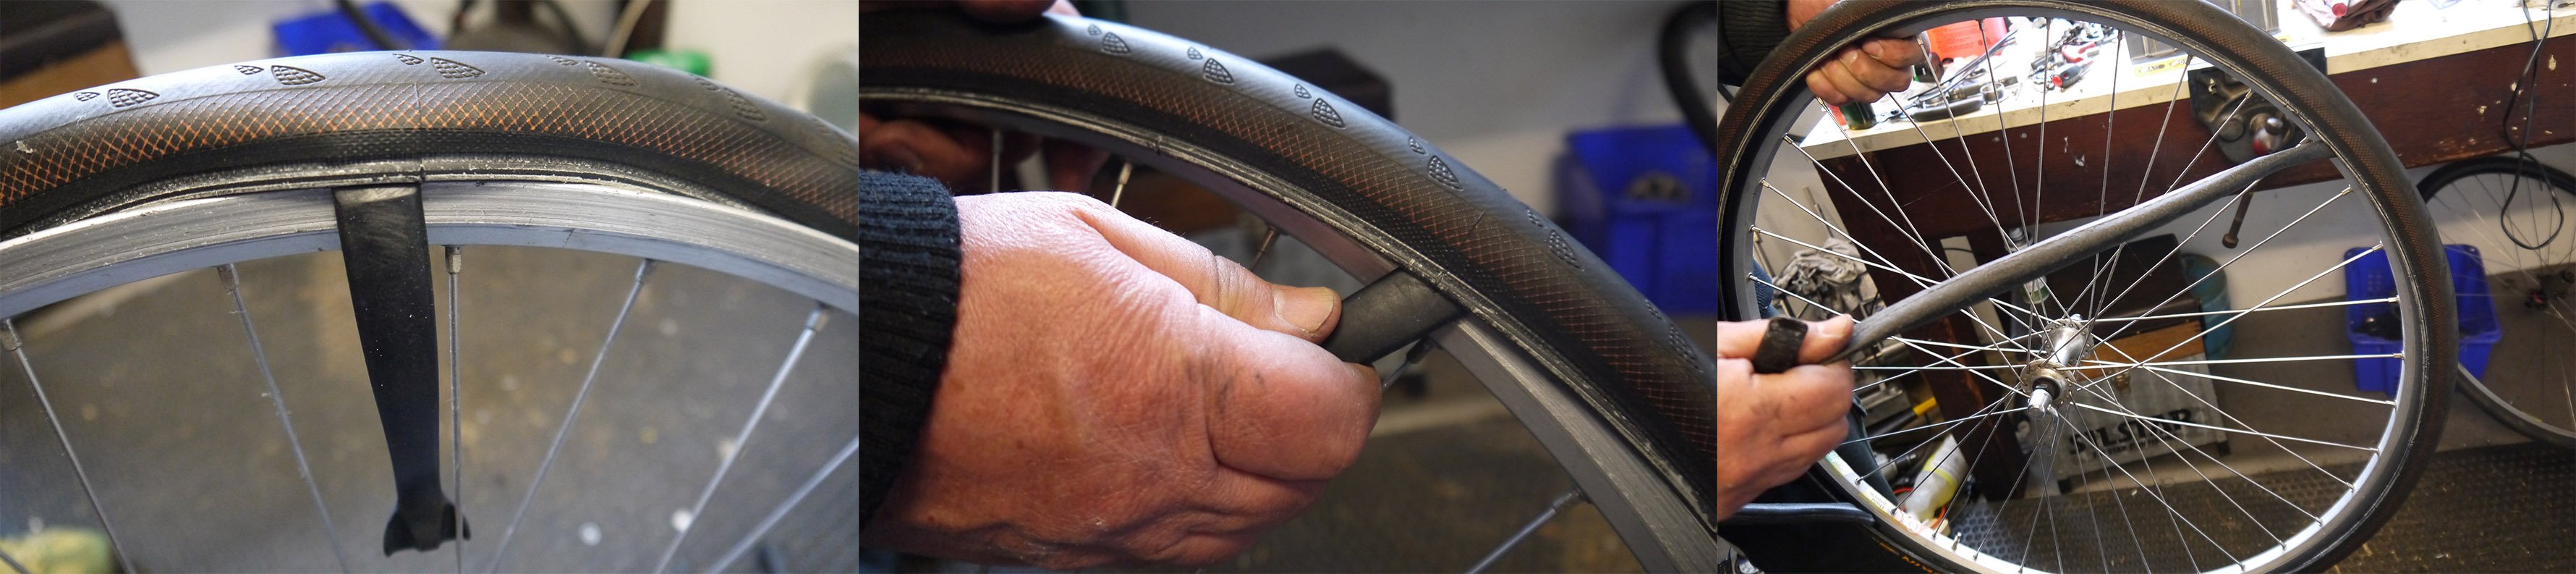
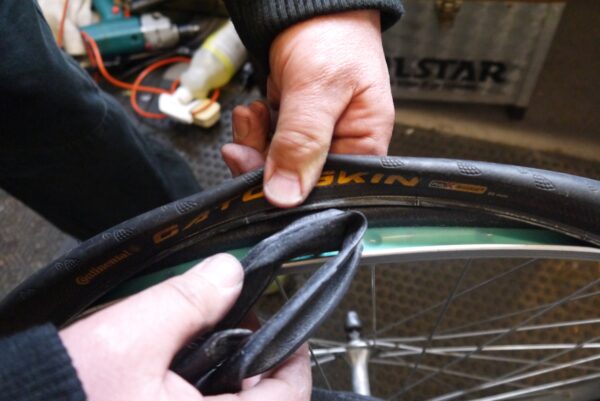
Deflate the tyre fully. Insert one tyre lever into the rim, opposite the valve. Lever it down against the rim, lifting the tyre bead until you can hook the other end of the lever to one of the spokes [fig 1]. Then insert the next tyre lever 10cm further down the tyre. After you’ve levered it in the same fashion, the edge of the tyre should ‘pop’ off and you can then slide the lever in your hand around the tyre [fig 2] until the tyre comes loose. Undo the lock ring on the valve, pull the tube out from the tyre [fig 3] and then press the valve out and up. Keep the inner tube in the same position relative to the wheel.
Step 3: Check what caused the puncture.
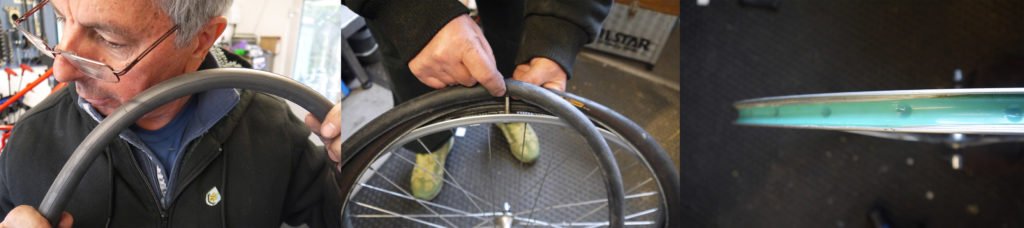
Pump the inner tube up partially. You should hear or feel the air escaping from the hole [fig 4]. Once you’ve found the hole in the tube, line it up against the tyre (valve above the rim hole) [fig 5]. This way you can check the inside of the tyre for anything that may still be protruding. If the air is coming from the outer edge of the tube, then something like a thorn or flint may have cut through the tyre and into the tube. If the hole is in the inner edge of the tube, this is most likely a pinch puncture. Either when the tyre has caught the tube, the rim tape isn’t in the correct position [fig 6] or not there at all. Take extra care when you re-insert the tube if this is the case.
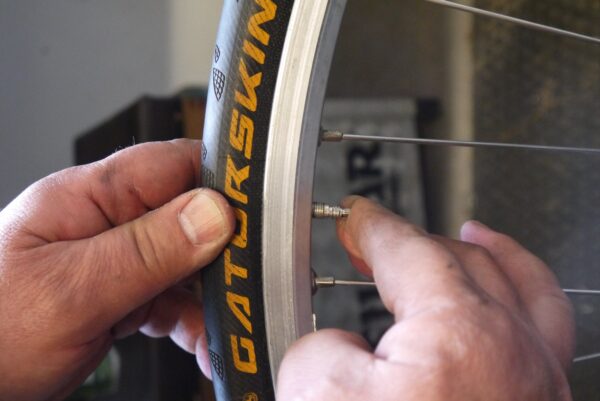
If there’s something obvious (glass or a nail), try to pick it out. If it’s more stubborn, dig it out with the screwdriver. Then, rub the rag around the inside of the entire tyre to check if it catches on anything else. Once you’re happy with the state of the tyre, adjust the position to align the tyre label above the valve hole (this means it’s just easier to find in the future) [fig 7]. Now time for the new tube**.
**We always advocate a new tube for safer and frustration-free riding. There’s a short note (3.1) on patch-repairing a hole at the end if you’d rather avoid using a fresher inner tube.
Step 4: Fold the inner tube back in.
To start, ensure one bead of the tyre is fully off the wheel, and the other bead is in between the rims. Unscrew the dust cap and lock ring from the new inner tube [fig 8]. Insert the valve into the rim hole. Gently fold the inner tube into the tyre until it’s fully slotted in.
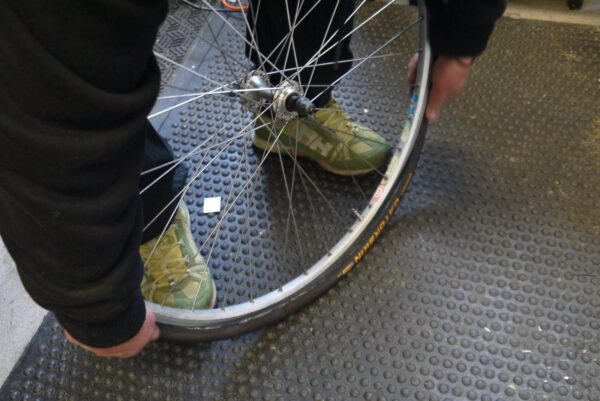
Step 5: Refitting the tyre.
Now to get the tyre back on without damaging the inner tube. The best way to do this is to press the valve up slightly freeing the area around it, pressing the tyre bead into the gap. Then stand the wheel upright, by your feet, valve at the top. Begin pressing the tyre with both hands behind the rim either side of the valve until your hand meet at the bottom [fig 9]. Keep the downward pressure going as this will slacken the tyre enough to let it pop in at the bottom (hopefully!). Try to avoid using tyre levers to get the last section of the tyre on as this can easily pinch the tube and you’re back to square one. If you do, use the flatter, unhooked side of the lever.
Step 6: Check and pump.
Once the bicycle inner tube is in and the tyre locked behind the rims, pump the tyre gently. When it reaches half pressure, hold the wheel either side of the hub and spin it slowly, checking for any irregularities, bumps or bulges in the tyre wall. If all looks good, continue to pump to the required pressure. Slot the wheel back into the dropouts then tighten the quick release and brakes again.
Step 3.1: Repairing the inner tube.
If you don’t have a spare bicycle inner tube to hand, there is always the option of a DIY puncture repair. Once you’ve found the hole, mark it with a pen or chalk. Dry the area and gently rub it with sandpaper to create some grip. Then, squeeze and smooth the glue around the hole, leaving it to set slightly. Peel the patch off the foil and press hard onto the glue to remove any bubbles. It’s always best to use a flat surface for this. Once the glue has set, dust the chalk over any exposed glue to ensure it doesn’t stick to the inside of the tyre. Back to Step 4.
How to get the most out of your tyres.
Ensure your tyres are pumped up to the correct pressure. The side wall of your tyre will serve as a guide. This should be checked regularly and before every big ride. This will help the handling, prolong the life of the tyre and prevent the bicycle inner tube from being pinched. Riding on under-inflated tyres allows the solid beading to move and pinch, possibly causing the valve to be twisted off the inner tube.
You should also check your tyres weekly for wear, cracks, cuts, sidewall damage or foreign objects. If in doubt replace your tyre. The last thing you want is a full blow out on a descent with traffic around you.
Thank you to Martin Wilkins at Cycle-Tech for his contribution; The UK’s network of mobile bicycle mechanics.
You can find their website HERE, offering full services for £59.