Along with a flat tyre, a broken bicycle chain is the most likely mechanical failure to leave you stranded by the roadside. Make sure you know how to repair a broken bicycle chain with this easy to follow repair guide from Simon Jackson of Cadence Performance.
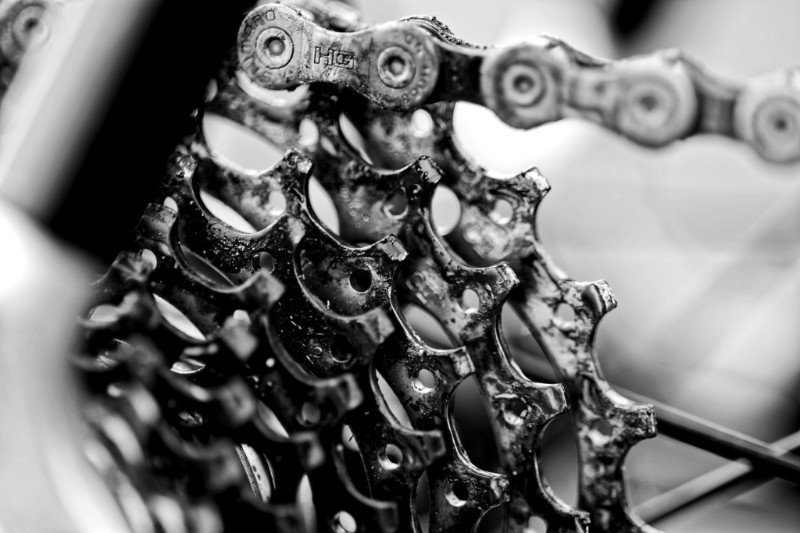
A broken bicycle chain will render your bike useless but can be repaired on the road, at least sufficiently to allow you to ride home.
You will need a bicycle chain-tool which comes as part of most multi-tools, as well as a spare quick-link. It is perfectly okay, and in fact advisable, to leave the quick-link permanently fitted for the life of your chain. They can be difficult to remove by hand, so be mindful of this before connecting the chain.
Initially it will be necessary to remove any broken parts of the bicycle chain. The method described below may render your chain a little shorter than usual, especially if the chain has twisted. This can mean that the new chain length may not accommodate the larger sprockets on your bike. As a rule, therefore, it is advisable to stick to gear combinations using the smaller chainrings and sprockets if you chain ends up shorter.
How to repair a broken bicycle chain:
- If the chain has not already fallen off the bike then remove it.
- With the chain removed, change the gears so that the front and rear derailleur align with the smallest chainring at the front and the smallest sprocket at the rear.
- Identify the nature of the damage. Usually it will be that one of the pins has lost its hold on one of the outer plates of the chain. Less often the plate of the chain may have broken. You should also inspect the chainrings, sprockets and both derailleurs for bent teeth or misaligned parts.
- Remove the broken parts of the chain by pushing out the pins adjoining the damaged parts.
With the pin-driver withdrawn, place the chain onto the hooks in the chain-tool. The hooks hold the chain so that the pin lines up with the pin-driver. Turn the lever so that the pin-driver pushes on the pin. Initially this requires significant torque, but is much easier after this point. A chain-tool with a long handle makes this easier.
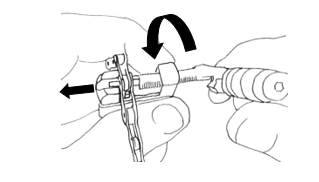
Figure a. Push out the pin with the chain tool.
In order to fit the quick-link you will need to end up with each end of the chain comprising of the inner plates. To achieve this it may be necessary to remove undamaged parts of the chain. Have a think about this before you push out any pins, which cannot be refitted, and remove only the minimum number of chain parts necessary.
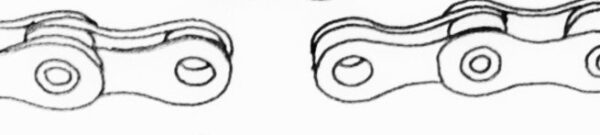
Figure b. Chain ready for quick-link.
- Rethread the chain through the gear parts. This can be fiddly and is best done with the bike in an upright position. Begin by threading one end of the chain through the cage of the front derailleur in the direction of the rear of the bike. Pass the chain over the smallest sprocket of the rear gears and then under the sprocket. The chain then should wrap around the top jockey wheel, to the front and the lower jockey wheel to it’s rear. Ensure that the broken bicycle chain is not rubbing on any part of the rear derailleur. When fitting the quick link it is best to leave the chain hanging behind the front chainring, to allow plenty of slack in the chain. If the instructions above are followed then the two ends of the chain will be positioned in the lower part of the chain.
Figure c. Diagram of the correctly fitted chain prior to being reconnected.
- Connect the two ends of the chain using the quick-link by following the steps below.
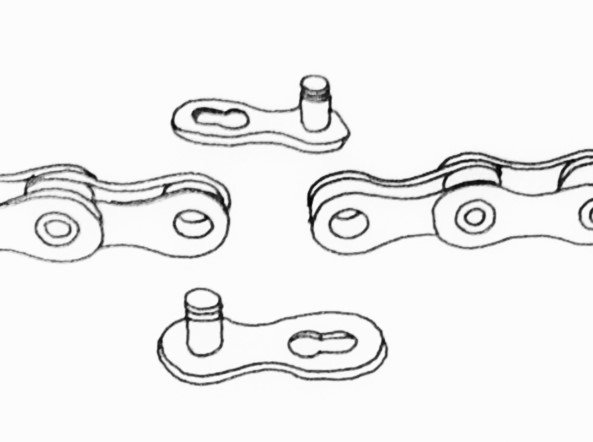
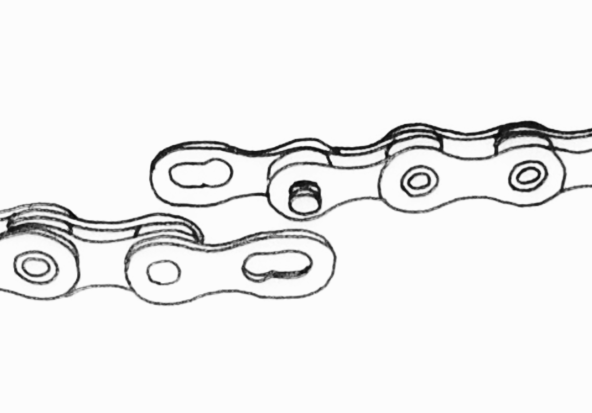
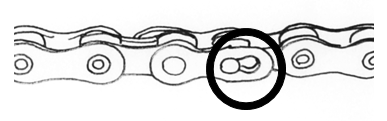
Figure d. This quick-link is not yet properly connected.
- To secure the quick link pull each end of the chain away from each other until it is extended to the full length of one chain link. If this cannot be done by hand, then place the chain on the front chainring and gently pedal backwards. When the quick-link has moved to the upper portion of the chain, then hold the rear brake and apply some downward force on the pedals. This will pull on the chain and engage the quick-link.

Figure e. The quick-link is securely connected.
- Once again ensure that each side of the quick-link is properly engaged. Fit the chain onto the chainring and test that it runs smoothly over the sprockets and chainrings before riding.
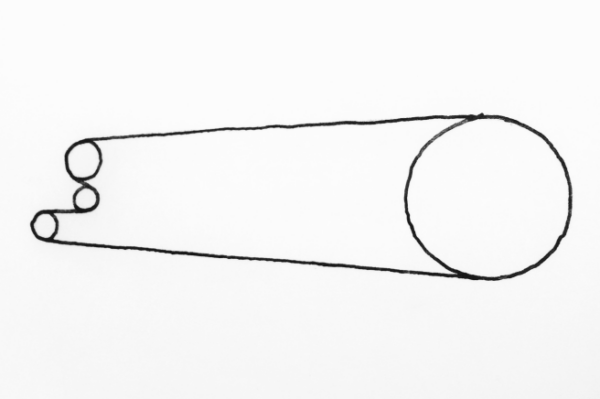
Figure f. Chain connected and fitted to the chainring.
Can’t fix your broken bicycle chain by the side of the road?
Sometimes we get mechanicals that we just can’t fix ourselves by the side of the road. Yellow Jersey Bicycle Insurance includes taxi reimbursement if you have a mechanical and cant get home. THis ‘break down recovery’ is available on the Performance and Ultimate tier policies.
MOre EXCELLENT cycling tips blogs:
- Learn how to use a chain wear indicator, and when to replace your bike chain
- How to wrap bar tape
- Top 10 tools for your home workshop
- How to change an inner tube
Cadence Performance are based in Crystal Palace. As well as offering top class repairs and servicing, you can join them for indoor cycling sessions, fitness testing, bike fitting and more. They are also a main dealer for award-winning Giant Bikes.