Getting the basics of bike geometry right will help your cycling. The geometry of a bike is hugely important when it comes to making a new purchase, as it directly affects the way you ride, and the optimal geometry is different for different types of cycling.
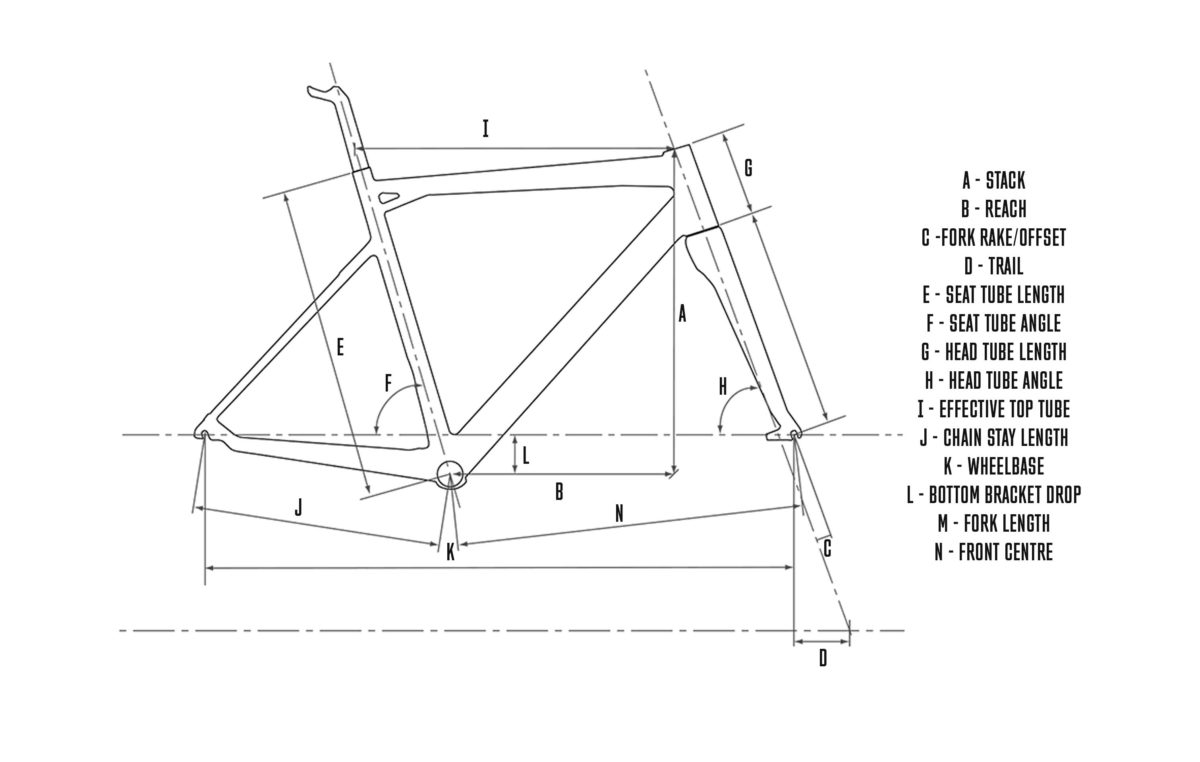
Your first exposure to this arcane science will no doubt be from a bike geometry chart, a confusing image of lines and measurements of a standard looking bike that can begin to make you feel a bit out of your depth. Peppered with jargon and oddly labelled angles, these charts can be a little difficult to decode. Couple that with the fact most bike brands’ geometry charts are different from one another and you have a real problem on your hands.
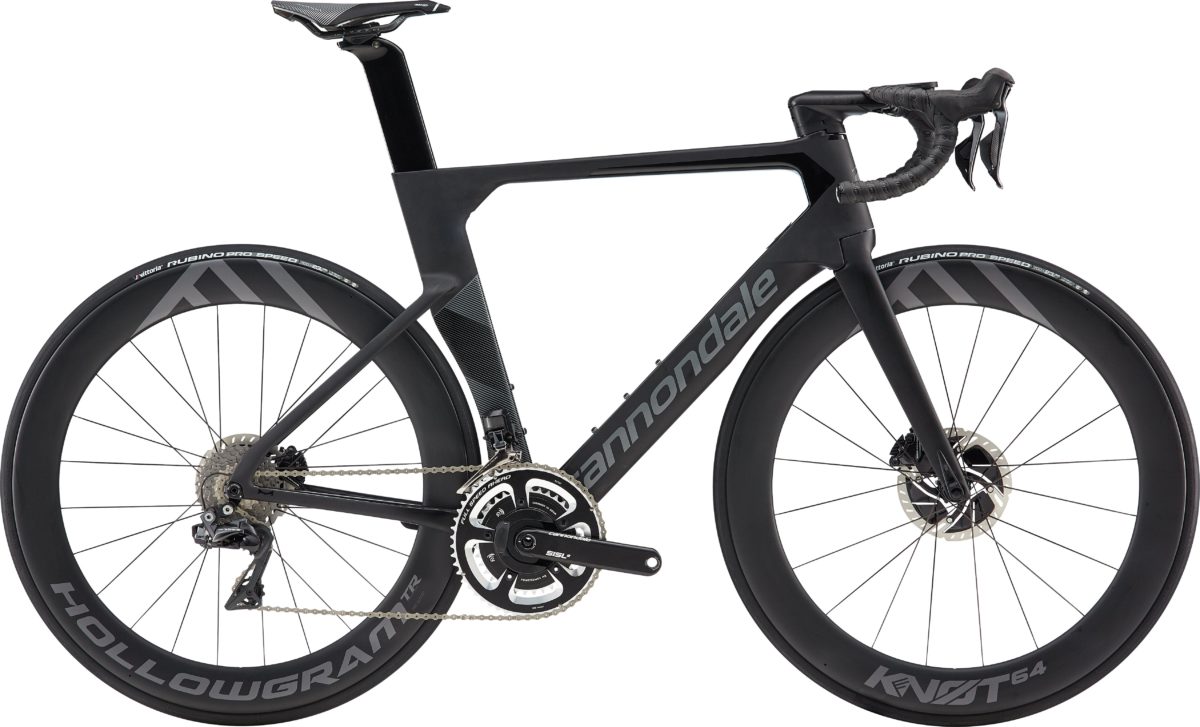
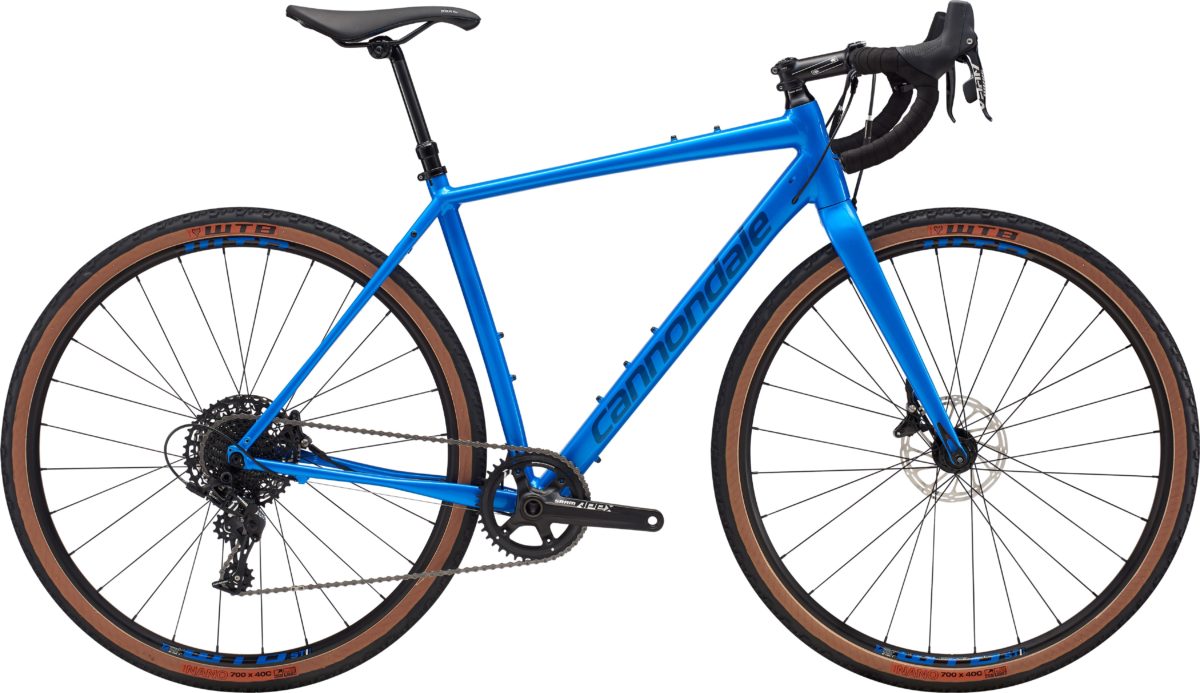
This makes for a few inconsistencies. The two most prominent styles are race and endurance. Yes, ultimately different types of models are used for different types of riding, with a more aggressive, ‘lower’ frame, useful for racing and a relaxed geometry frame, useful for long rides and touring.
There is much more to it than just that…
If you can understand these confusing charts and geeky nuggets of bike tech lore, then you’re on to a winner. Here we will endeavour – with the help of expert input – to explain bike geometry and how each measurement is taken and how that then influences the ride quality. We hope that by the end of it you will take those IKEA looking charts you get with your bike a bit more seriously and understand the importance of a bike’s geometry.

How much difference can bike geometry make?
We posed this question to expert bike fitter James Thomas who told us, “Bike geometry can make an enormous difference.”
Crucially, the difference between a bike that fits and a bike that doesn’t could mean the difference between being in pain and not. When you sit for hours on a bike that fits badly – even if the misalignment seems infinitesimal – the fact that you are repeating the same action of pedalling over and over could lead to serious discomfort or even injury.
Equally, a correctly fitted machine with the suitable geometry can lead to major performance gains. Painstaking care is taken over every possible geometric detail when it comes to producing elite competition bicycles, with the tiniest difference leading to massive gains (or losses). We’ve seen riders fall out with their teams in recent years over the designs of their sponsor-issued bikes and micro-adjustments to position lead to World Championship victories.
James also understands the importance of looking good on a bike and says that a bike that is fitted properly “will not only handle better, it will generally look better as well.” Something we all take into account before splashing out on a new piece of kit.

What is something most people get wrong about bike geometry?
“Most consumers I encounter have a tendency to buy bikes too long and too low,” says James. He uses the example of a desk-bound rider looking at buying a Pinarello Dogma – a bike designed for Chris Froome to win the Tour de France on. This rider, despite the flashy marketing, isn’t necessarily going to get on with an aggressive position requiring massive flexibility. “You have to consider the physiological make-up of the rider.”
This is where the importance of getting a proper bike fit comes in. An expert can size the bike to you precisely, by taking into account how you ride, how you sit on a bike and the type of riding you wish to do.
James is one such fitter and uses technology, as well as years of experience, to fit a rider to their bike. “My attitude to bike fitting is relatively simple. I observe dysfunction and seek to remove it from the equation.”
“An example of this might be a rider pointing their toes through the bottom of the pedal stroke due to an excessive saddle height or riding with their hands perched on top of the controls to reduce the reach of a bike that is too long.”
James describes humans as “positionally self-select” which he explains means that a rider will put themselves into the position on the bike that they want, regardless of their interaction with the bike. He explains that “it is then this poor interaction that often results in discomfort or a loss in performance.”
What are the essential principles of bike geometry?
As mentioned earlier, there are several styles of bike geometry with race and endurance being the most prominent among road bikes. James, our expert on these matters, says, “The fundamental differences are that an endurance bike is typically taller for a more upright position and shorter in the reach.”
“The wheelbase is longer, and the head tube angle is generally slacker,” [Don’t worry, we’ll come to this] “resulting in a more stable bike. Race bikes are essentially the other way around and tend to be more agile in their ride quality.”
But bikes have come a long way even in the last decade. “With the recent advances in frame technology, endurance bikes aren’t really any slower than their race orientated counterparts, they’re simply easier to ride and a little more comfortable,” says James.
So now we have the view from an expert, let’s take a look at what all this jargon refers to on a bike geometry chart.

Stack and Reach
These two measurements are the fundamental principles of bike geometry, and they sort of work in unison. They are important as they are some of the most important measurements to take before comparing bike brands and sizes.
Stack is the vertical distance from the centre of the bottom bracket to the centre of the head tube. This determines how low the bars can sit. An endurance bike will have a greater stack than a racer.
Reach is the horizontal difference between the same two points. Basically, how far in front of the bottom bracket the top centre of the head tube is. This is a fundamental measurement in a bike fit as it determines how long a frame is. Performance road bikes will have a longer reach as to get the rider into a more aerodynamic profile. (yes, there’s a lot of jargon-busting to be done)
This is different from rider reach, which is the measurement taken from the tip of the saddle to the end of the stem.
Size
Bikes come in a huge array of different shapes and sizes, and the sizes given by bike brands have no relation to bike geometry. Most brands size their bikes in unique ways, just to make it extra confusing. Measurement is taken in centimetres of the length of the seat tube and then either described on the basis of that exact measurement e.g. 51cm, 54cm, 56cm etc. or that measurement is allocated a vague size range i.e. small, medium, large etc.
However, this information alone means diddly squat when it comes to comparing bike types and brands. You may be suited better to a 56 in one brand/type of bike but then find out that another brand has you down as a 54, neither is wrong, it just shows that bike sizes aren’t actually a universal measurement. It is a good place to start though.
Fork Rake and Offset
Now we start dealing with dotted lines and invisible fields, the chart gets a bit more complicated and like instructions for a piece of furniture, it may feel easier just to chuck it over your shoulder and leave it for another day. But don’t turn away yet – luckily, a bike fitter loves the sight of a geometry chart.
Fork rake and fork offset mean the same thing just for different bike types, rake for road bikes and offset for mountain bikes. It refers to a straight line from the centre of the fork all the way to the ground, with a vertical line going through that same point of the fork. The amount of area between the two lines is then the rake and offset. This is all to do with handling as increasing the offset will make the steering feel faster while decreasing it will make it slow.
Bikes go a bit Einstein at this point with every action you take creating another reaction down the line, increasing the rake will then increase the wheelbase. Increasing the fork offset, reduces the amount of trail, speeding up a bike’s handling.
‘But wait, what does trail mean?’ A thousand tiny voices scream out and ask, well…
Trail
Trail can be tricky to get your head around, but it is important to understand when it comes to how your bike feels. Luckily we have James to put it into more simpler terms: “Trail essentially refers to how far in front of the head angle the front axle is. It’s one of the parameters that influences a bike’s handling. A longer trail makes for a more stable bike.”
Bikes with a longer trail are designed for high speed turns where stability is gained through speed and where you lean the bike to corner rather than turning the bars. This is good for people who ride at higher speeds and are not concerned with manoeuvrability at lower speeds. These bikes then have a longer top tube to account for the longer trail.
On the other hand, bikes with a shorter trail are more stable when being leant over at slower speeds these are great for tight turns but can feel twitchy and unstable at high speeds if you’re not used to it. A shorter trail will ride well at slower speed so is more useful for commuters in urban areas who need to take tight turns.
Most trails on the average bike are pretty neutral, so seeking a custom trail is a huge change you can make on a bike for your own style.
Seat tube length & angle
There are two measurements to take on the seat tube, the angle and the length. The Length is measured from the centre of the bottom bracket to where the top tube meets the seat tube. The angle of the seat tube in relation to the ground is then the seat tube angle.
The angle doesn’t change much between different types of bikes, mainly staying between 71 and 74 degrees. This angle can be changed by manipulating how set back the saddle is. A shallower angle can result in a rider using a different muscle group when riding.
Head Tube length & angle
The head tube also uses the same two measurements and makes a bigger difference to how a bike rides compared to the seat tube length and angle.
The head tube length is measured from the bottom to the top of the head tube and – like the top tube – the angle of the head tube in relation to the ground is then the head tube angle.
A longer head tube makes for a more upright position as it raises the front end somewhat. Conversely, a short head tube will lower the front end and improve the aerodynamics as the rider is put into a lower, tucked position. Therefore, this makes for a huge difference to how a performance road bike will ride.
When it comes to the head tubes angle, a slack angle will make for a better performing bike at slower speeds but require a little extra oomph to propel it forward. Examples of a much slacker head tube angle can be found on mountain bikes, which need the stability when the route gets technical. A steep angle is more commonly associated with road bikes and works in the same way as having a longer trail, namely better, more stable handling at high speeds.
Effective Top Tube
This length is measured between the centre of the seat tube to the centre of the top of the head tube, parallel to the ground.
It is important to note that this doesn’t just mean measuring the length of any old tube, as mountain bikes with sloping top tubes would then provide an inconsistent measurement. This measurement gives us an idea of how ‘stretched out’ a bike will feel to ride. This is a particularly key measurement on mountain bikes because at first glance, full-sus bikes look pretty small and compact but taking notice of the distance between the seat tube and head tube, really helps to show the actual size of the bike.
Chainstay length and wheelbase
Like stack and reach, these measurements come as a twosome. Chainstay length is the measurement from the bottom bracket to the rear dropouts (where your rear wheel ‘slots in’ to the frame).
Typically, long chainstays improve stability, and short ones mean sharper handling. A long chainstay makes the wheelbase longer, and vice versa.
Wheelbase is then the distance between the front and rear axles. A lot of what has already been spoken about dictates this length namely the head tube angle, fork rake/offset, reach and chainstay length. Generally speaking, a longer wheelbase means a more stable bike but one that’s slower to turn.
A shorter wheelbase as determined by the elements above then means a nimble, aggressive and faster feeling bike. Therefore, even the smallest of difference between chainstays, makes a big change to the feel of the bike, even if both bikes are marketed as a size 54.
Bottom Bracket height and clearance
This is the distance between the ground and the centre of the bottom bracket. This measurement, along with a few others on the bike, are more commonly referred to as a whole as clearance. This is especially prevalent for off-road riders like mountain bikers and cyclocross riders, who need to know the clearance their bottom bracket will have when negotiating obstacles. Hence, a cyclocross bike will have a higher bottom bracket than a road bike. A lower bottom bracket makes the bike feel more planted on the ground and some downhill bikes will strike a balance between the height required to clear obstacles and the added stability that a lower bottom bracket confers.
Bottom Bracket drop
This is the vertical distance from the centre of the bottom bracket to an imaginary line between the front and rear dropouts. Essentially, how low a rider is on a bike.
A big drop will mean that there is a lower centre of mass, resulting in a bike which corners well. This then has to be balanced with the length of your cranks – long cranks on a bike with a large bottom bracket drop, could spell disaster as the pedal makes contact with the tarmac and produces that terrifying scratching sound, or worse, a crash.
A smaller bottom bracket drop results in a bike that is more stable at slower speeds and less twitchy when riding in a straight line, so you have to put in more power to move the bike forwards. This is why a track bike has very small bottom bracket drop, so that riders can pedal on the steeply-inclined banks of a velodrome.
Where the trail dictates how the front end of a bike handles, the bottom bracket drop dictates how the rear of the bike handles, two-wheel-drive if you like. Finding the balance then is the key, otherwise, you may as well ride a unicycle.
Saddle height
Saddle height is a big change that any rider can make to their bike’s geometry. The tendency is to bring the saddle up to change your position, but this is only a temporary fix and without changing other aspects of the bike, can lead to long-term issues.
Our expert James has a cautionary tale for such a measurement. “My position was set by a bike fitter with the saddle too high,” says James. “I tested the difference a 20mm reduction made on a closed road circuit and couldn’t believe the change it made to the handling of the bike. It was considerably faster into and out of corners thanks to the lower centre of gravity and reduced weight through the front of the bike – a typical symptom of excessive saddle height.”
Bar height
Bar height is a vertical measurement from the floor to the handlebars/grips. This can change by either switching handlebars or changing the spacers above and below the stem.
A higher bar allows a rider (especially a mountain biker/cx racer) to distribute their weight to the back of their bike more easily, reducing fatigue and making for a better position when climbing in the saddle. A lower bar height will then put the rider into a more aggressive position which on the road will mean getting more aero and on a mountain bike means more weight over the front wheel resulting in quicker changes in direction. This will also change how a rider takes any bumps or hits on a trail.
Stem length
Stem length is a small change you can make to any bike after purchase, that makes a really big difference. A longer stem makes for slower handling and more input put into the movement. A longer reach and wider handlebars will also make the same difference. These are changes you can do to any bike to make a significant difference.
Thought we were done with the complicated jargon? Well now here comes another spanner into the works. On its own, each measurement doesn’t matter towards how a bike will feel to ride. They all work in unison with each other, hence that previously inexplicable chart.
It is important to remember that the feel, size and geometry of a bike is different and unique to every single rider. This is where proper bike fits are so important as when you are fitted properly you will realise all the intricate little changes that can be made to a bike’s geometry that will help your style and improve your performance on the bike.
As a result, it is important to build up a frame of reference with the bikes that you have ridden over the years. What you like and don’t like about them can then help you delve into the geometry factors at play that will then inform your next bike purchase. This is important as you will build up a picture of why you like a certain characteristic and why you will need a slightly different geometry on different styles of bike for different types of cycling.
We will leave you with the wise words of our expert James, who says:
“I strongly recommend anyone thinking of buying a bike that they have a fit before they buy a bike. Go to the International Bike Fitting Institute’s website to find your closest fitter. This removes the guesswork from the equation and empowers the rider to make more informed purchasing decisions rather than simply adhering to marketing guff or journalist opinions.”
Yellow Jersey would like to thank James Thomas for his invaluable insight. He can be found at:
James Thomas, Bicycle LTD, 120A Sheen Road, Richmond Upon Thames, TW9 1UR
https://www.bicyclerichmond.co.uk/
Or on Instagram at @bicycle.ltd
Whatever bike you have, Yellow Jersey can cover you. Click here for a free quote.